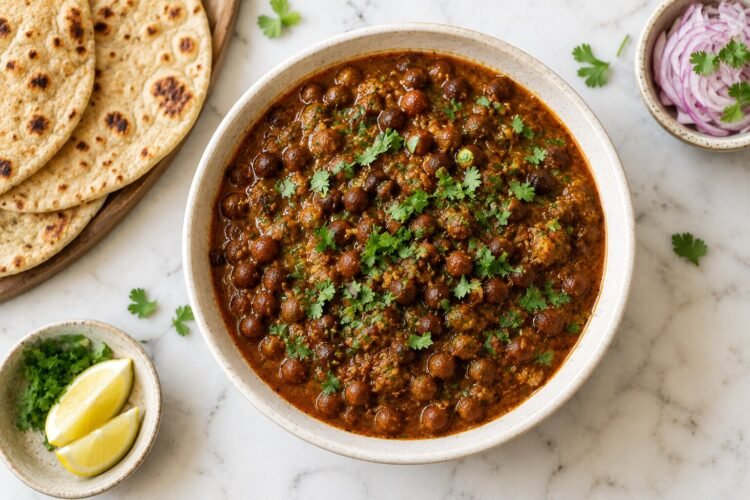
There is something quietly powerful about a bowl of kala chana. It doesn’t demand attention the way a rich paneer dish or a slow-cooked biryani does. It arrives without fanfare — earthy, deeply spiced, almost austere in its simplicity. And yet, in millions of Indian homes, it is the meal people reach for on busy weeknights, the dish that appears in tiffin boxes from Mumbai to Delhi, and one of the first recipes many Indians teach their children.
Kala chana — literally “black chickpeas” in Hindi — are the original Indian chickpea. Long before the larger, pale kabuli chana found its way into Indian kitchens, these smaller, darker, rougher-skinned desi chana were the legume that sustained Indian households through centuries of farm labour, festivals, and frugal home cooking. They are harder to overcook, more flavourful, and arguably more nutritious than their larger cousins. And they make one of the most satisfying curries you can produce from a handful of pantry staples.
This guide covers everything: the complete recipe with three cooking methods (pressure cooker, open pot, and Instant Pot), the science of why overnight soaking matters, how to build a perfect onion-tomato masala, and what to do when your curry doesn’t turn out the way you expected. Whether this is your first time cooking kala chana or your hundredth, there is something useful here for every cook.
What Is Kala Chana? (And Why It’s Different from Regular Chickpeas)
Before getting to the recipe, a brief introduction to the ingredient — because kala chana and the kabuli chana you might use in hummus or a weeknight chickpea soup are genuinely different, not just in colour.
Kala chana (desi chana) is the native Indian variety of chickpea (Cicer arietinum). They are small, dark brown to nearly black in colour, and have a noticeably rough, wrinkled skin. They are also called brown chickpeas, desi chana, or Bengal gram in their split form (chana dal).
Kabuli chana — the large, cream-coloured chickpeas — are a different variety, originally from Afghanistan, that arrived in India during the Mughal period and gradually became associated with restaurant-style chole.
| Feature | Kala Chana (Desi) | Kabuli Chana |
|---|---|---|
| Size | Small | Large |
| Colour | Dark brown to black | Cream/beige |
| Skin | Rough, thick | Smooth, thin |
| Flavour | Nutty, earthy, robust | Mild, buttery |
| Protein | Higher per 100g | Slightly lower |
| Fibre | Higher | Slightly lower |
| Cook time | Longer (needs thorough soaking) | Shorter |
| Best for | Curries, chaat, sundal, sprouts | Chole, hummus, salads |
The Nutritional Case for Eating More Kala Chana
Kala chana is one of the most nutrient-dense foods in the Indian diet — and one of the most affordable. Here is what a single serving (approximately one cup of cooked curry, per this recipe) delivers:
| Nutrient | Per Serving |
|---|---|
| Calories | 249 kcal |
| Protein | 8g |
| Carbohydrates | 33g |
| Dietary Fibre | 3g |
| Iron | 3mg (17% DV) |
| Calcium | 111mg |
| Potassium | 486mg |
| Vitamin C | 13mg |
Why these numbers matter:
- Protein: At 8g per serving from a plant source, kala chana is one of the best non-meat protein sources in Indian cooking. Combine it with rice or roti to form a complete amino acid profile.
- Iron: A 17% DV iron contribution per serving is significant, especially for vegetarian households where plant-based iron sources are crucial. Adding lemon juice at serving (as recommended below) improves non-haem iron absorption by 67%.
- Resistant starch and fibre: The combination of soluble and insoluble fibre supports digestive health, feeds beneficial gut bacteria, and contributes to sustained satiety — making kala chana a naturally good choice for weight management.
- Low glycaemic index: Despite their carbohydrate content, legumes have a low glycaemic index, meaning they raise blood sugar slowly and steadily. This makes kala chana an excellent staple for people managing blood sugar levels.
- Antioxidants: The dark skin of kala chana is rich in polyphenols, the same class of antioxidants found in blueberries and dark chocolate. These compounds have anti-inflammatory properties.
Ingredients (Serves 4)
For the Curry
| Ingredient | Amount |
|---|---|
| Kala chana (black chickpeas), dried | 1 cup |
| Oil or ghee | 2 tbsp |
| Cumin seeds | ½ tsp |
| Onion, finely chopped | 1 cup (1 large) |
| Green chilli, chopped | 1 (optional) |
| Ginger garlic paste | 1½ tsp |
| Tomatoes, chopped or pureed | 1 cup (2-3 medium) |
| Salt | ¾ to 1 tsp |
| Red chilli powder | ½ tsp |
| Coriander powder | 1½ tsp |
| Garam masala | ½ to ¾ tsp |
| Turmeric | ¼ tsp |
| Water | 3 cups (2 cups for Instant Pot) |
| Fresh coriander leaves, chopped | 2 tbsp |
| Lemon juice | From 1 small lemon |
Optional Finishing Touches (Highly Recommended)
- 1 tbsp ghee — drizzled over before serving for depth and shine
- 1 tsp kasuri methi (dried fenugreek leaves) — adds a restaurant-quality layer of flavour
- ½ inch fresh ginger, cut into thin julienne strips — adds brightness and a fresh bite
Before You Cook: The Soaking Rule (And Why You Cannot Skip It)
Kala chana has a significantly thicker skin than kabuli chana, which means it is genuinely difficult to fully cook without soaking. If you cook unsoaked kala chana, you will likely end up with either an extended cooking time or chickpeas that are still hard at the centre even when the outside appears done.
Standard overnight soak (best results): Rinse 1 cup of kala chana thoroughly under running water, picking out any small stones or debris. Place in a bowl with 4-6 cups of cold water and leave to soak for 6-8 hours or overnight. The chickpeas will roughly double in size. Drain and rinse before cooking.
Quick soak (when you forgot overnight): Bring a kettle of water to boil. Pour approximately 3 cups of boiling hot water over the rinsed chickpeas and soak for 1 hour. They will not absorb as much water as the overnight method, so add 2-3 minutes to your pressure cooking time.
Why soaking reduces digestive discomfort: Raw legumes contain oligosaccharides — complex sugars that the human gut cannot break down. When soaked, these compounds leach into the water (which is discarded). The result is a cooked chickpea that is significantly easier to digest and less likely to cause bloating. This is why the soaking water is always discarded and replaced with fresh water for cooking.
The Perfect Onion-Tomato Masala: The Foundation of the Curry
Before any method-specific instructions, it helps to understand what you’re building with the masala — because the quality of the base directly determines the quality of the finished curry.
The goal is a masala that is:
- Deep golden-brown in colour — not pale, not burnt, but genuinely golden. This comes from properly caramelised onions and takes 8-10 minutes of patient cooking.
- Thick enough to coat the back of a spoon — the tomatoes must be fully cooked down with no pooling liquid. This is what prevents a watery curry.
- Fragrant and slightly sticky — this means the oil has separated from the masala, which is a sign that the tomatoes and spices have cooked through.
Rushing either the onions or the tomatoes is the most common reason home-cooked kala chana ends up thin and flat-tasting.
Method 1: Stovetop Pressure Cooker (Most Common Indian Method)
Total time: 40-50 minutes (after soaking)
Step 1 — Bloom the cumin: Heat 2 tablespoons of oil or ghee in the pressure cooker over medium-high heat. Add the cumin seeds and wait — this should take 30-40 seconds — until they sizzle vigorously and release a toasted, nutty aroma. Do not rush this step; under-cooked cumin adds bitterness rather than depth.
Step 2 — Build the golden onion base: Add the finely chopped onion and the optional green chilli. Stir and cook over medium heat for 8-10 minutes, stirring every 2 minutes, until the onions are light golden. The exact timing depends on your cooker and flame — look for colour, not the clock.
Step 3 — Sauté the ginger garlic paste: Add 1½ teaspoons of ginger garlic paste and cook, stirring constantly, for 1-2 minutes until the raw garlic smell is gone and the paste turns lightly golden. This step is quick — if the paste starts sticking to the pan, add a small splash of water and scrape the base.
Step 4 — Cook the tomatoes down to a thick masala: Add the chopped or pureed tomatoes and cook on medium heat for 6-8 minutes, stirring frequently, until the tomatoes have fully broken down, the oil separates visibly around the edges, and the masala is thick. If using pureed tomatoes, this happens slightly faster.
Step 5 — Add the dry spices: Add the turmeric, red chilli powder, coriander powder, garam masala, and salt. Mix well and cook for 1-2 minutes until the spices are fragrant and fully incorporated into the masala.
Step 6 — Pressure cook the chickpeas: Add the drained, soaked chickpeas and 3 cups of water to the masala. Stir to combine. Close the pressure cooker lid securely. Cook on medium heat for 10 whistles (approximately 25-30 minutes). Allow the pressure to release naturally — do not force the valve.
Open the cooker carefully. Test a chickpea by pressing it between your fingers — it should be completely soft with no hard core. If not tender, close the lid and pressure cook for 2 more whistles.
Step 7 — Finish and garnish: Add the fresh coriander leaves, the optional ghee, kasuri methi, and ginger julienne. Simmer uncovered on low heat for 2-3 minutes to meld the flavours. Taste and adjust salt. Squeeze lemon juice just before serving.
Method 2: Open Pot (No Pressure Cooker)
This method takes longer but allows you to control the texture very precisely and is the right approach if you don’t own a pressure cooker.
- Place the soaked, drained chickpeas in a large heavy-bottomed pot. Add 3 cups of water and bring to a boil.
- Reduce to a simmer and cook for 1 to 1.5 hours, topping up with hot water as needed to keep the chickpeas submerged. They are done when completely tender.
- While the chickpeas cook, prepare the onion-tomato masala in a separate pan following Steps 1-5 above.
- Once the chickpeas are tender, drain them (reserving 1 cup of the cooking liquid) and add them to the prepared masala.
- Add the reserved cooking liquid and simmer together for 15-20 minutes on medium-low heat until the curry is thick and the chickpeas have absorbed the masala flavours.
- Finish as above.
Method 3: Instant Pot (Hands-Free, Set and Forget)
Total time: 55-60 minutes (after soaking, including pressure build and release time)
- Press Sauté on the Instant Pot. Heat 2 tablespoons of oil. Add cumin seeds (and optional whole spices: 1 bay leaf, 2-3 cloves, ½ inch cinnamon, 1 green cardamom). Let them splutter.
- Add onion and green chilli with a pinch of salt. Sauté 5-6 minutes until golden.
- Add ginger garlic paste. Sauté 30-60 seconds.
- Add tomatoes and spice powders. Sauté 2-3 minutes until thick. Add 2-3 tablespoons of water and scrape the bottom of the pot thoroughly to deglaze — this prevents the “Burn” error.
- Add 2 cups of water and the soaked, drained chickpeas. Press Cancel.
- Seal the lid. Set valve to Sealing. Pressure cook on High for 35 minutes (40 minutes for older chickpeas that have been stored for more than 6 months).
- Allow natural pressure release for at least 15 minutes, then manually release any remaining pressure.
- Open, press Sauté, add ghee, kasuri methi, and ginger julienne. Stir and simmer 2 minutes.
- Garnish with coriander and lemon juice before serving.
Serving Ideas
Kala chana curry is tremendously versatile at the table.
- Tiffin classic: Packed with plain roti and raw onion rings
- Sunday meal: Served with jeera rice, a wedge of lemon, and a cucumber raita alongside
- Chaat-style serving: Topped with chopped onion, green chutney, tamarind chutney, and sev for a quick street-food-style bowl
- Aloo kala chana: Boil 2 medium potatoes separately, cube them, and add to the finished curry. Simmer 3-4 minutes. One of the most popular variations across North India.
Troubleshooting: When Things Don’t Go as Planned
Problem: Chickpeas are still hard after pressure cooking. Cause: Old chickpea stock (stored more than a year). Old legumes have dried out further and take significantly longer to cook. Fix: Pressure cook for 3-4 more whistles. Alternatively, add a small pinch (⅛ tsp) of baking soda to the cooking water — it softens legumes faster, though it very slightly affects the flavour.
Problem: Curry is too thin/watery. Cause: Tomatoes were not cooked down fully, or too much water was added. Fix: Simmer uncovered on medium heat for 8-10 minutes until the gravy thickens to your preference. You can also scoop out 4-5 tablespoons of the curry, blend it smooth, and stir it back in to naturally thicken the gravy.
Problem: Curry tastes bland or slightly sweet. Cause: Onions were not sautéed to a deep enough golden colour, or the variety of onion used was sweeter than expected. Fix: Add ¼ tsp more garam masala, a pinch of black pepper, and a squeeze of lemon. Alternatively, add ½ tsp of amchur (dry mango powder) for tartness that balances sweetness.
Storage and Meal Prep
Kala chana curry is an exceptional meal prep dish. The flavour deepens noticeably on day two as the chickpeas continue absorbing the masala overnight.
- Refrigerator: Up to 4 days in an airtight container. Reheat with a splash of water on the stovetop or microwave.
- Freezer: Up to 4-6 weeks. Cool completely, portion into freezer-safe containers, and freeze. Thaw overnight in the refrigerator. Reheat on the stovetop until it comes to a full boil, then simmer 5 minutes.
- Make a double batch: Kala chana takes the same effort for a double batch as a single one. The extra portions freeze beautifully and make a week of lunches essentially effortless.
Frequently Asked Questions
Q1. Can I use canned black chickpeas instead of dried?
Yes. If using canned kala chana, drain and rinse them thoroughly. You do not need to soak or pre-cook canned chickpeas — they are already fully cooked. In the pressure cooker method, add them after the masala is ready and pressure cook for just 1-2 whistles, or simply simmer in the open pot for 15-20 minutes to absorb the masala. In the Instant Pot, reduce pressure cooking time to 10-11 minutes and reduce water by about ⅓ cup.
Q2. Is kala chana the same as chana dal?
Not exactly, though they come from the same plant. Kala chana refers to the whole black chickpea. Chana dal is the split and skinned version of the same desi chana — it looks yellow and pale after the dark skin is removed. They cook very differently: chana dal cooks much faster (15-20 minutes on the stovetop) and produces a smooth, thick dal. Whole kala chana keeps its shape and texture and requires much longer cooking.
Q3. Do I need to soak kala chana if I have an Instant Pot?
Technically you can cook unsoaked chickpeas in an Instant Pot — simply increase the cooking time to 50-60 minutes on High pressure. However, soaking is still strongly recommended for two reasons: it reduces digestive discomfort significantly by removing oligosaccharides, and it gives more even, thorough cooking. Unsoaked chickpeas in a pressure cooker sometimes cook unevenly — soft on the outside, still chalky at the centre.
Q4. How do I make kala chana sprouts (kala chana sprouts)?
Soaked kala chana is one of the easiest legumes to sprout. After overnight soaking, drain and transfer the chickpeas to a muslin cloth or a clean cotton kitchen towel. Tie it loosely and hang in a warm corner of your kitchen, or place in a colander over a bowl. Rinse with water twice daily (morning and evening). Within 24-36 hours in a warm climate, you will see small sprouts emerging. Eat raw in chaat, lightly sauté with lemon and chilli, or steam briefly and season for a simple high-protein snack.
Q5. Can I make kala chana without onion and garlic?
Yes — a no-onion, no-garlic version is commonly made for fasting days (vrat) or Jain-style eating. Replace the onion with finely chopped tomatoes (use 2 cups total). Skip the ginger garlic paste and use only a larger quantity of fresh ginger (1 inch, grated). Add a pinch of asafoetida (hing) when blooming the cumin to add depth. The resulting curry will be tangier and slightly thinner but deeply flavourful.
More Than Just a Recipe
Kala chana is the kind of dish that rewards you beyond the recipe. It freezes well, makes excellent leftovers, costs almost nothing per serving, and delivers real nutritional substance. In a country where protein is often expensive and animal-based, kala chana has quietly been solving that problem for thousands of years.
Make it once and you’ll understand why it appears in so many Indian kitchens, so many tiffin boxes, so many comfort bowls — not because it is fashionable, but because it is genuinely good.
Made this recipe? Leave a star rating and your variation in the comments below — whether you made it with aloo, added sprouts, or tried the Instant Pot method, we’d love to hear how it turned out.
More on KitchenWhisper.in:
- High Protein Moong Dal Chilla for Weight Loss
- Paneer Bhurji – Quick High Protein Breakfast
- Chicken Keema Curry – Rich & Spiced
- Kurkuri Bhindi – Crispy Okra Fry
- Palak Tofu – Spinach Tofu Curry