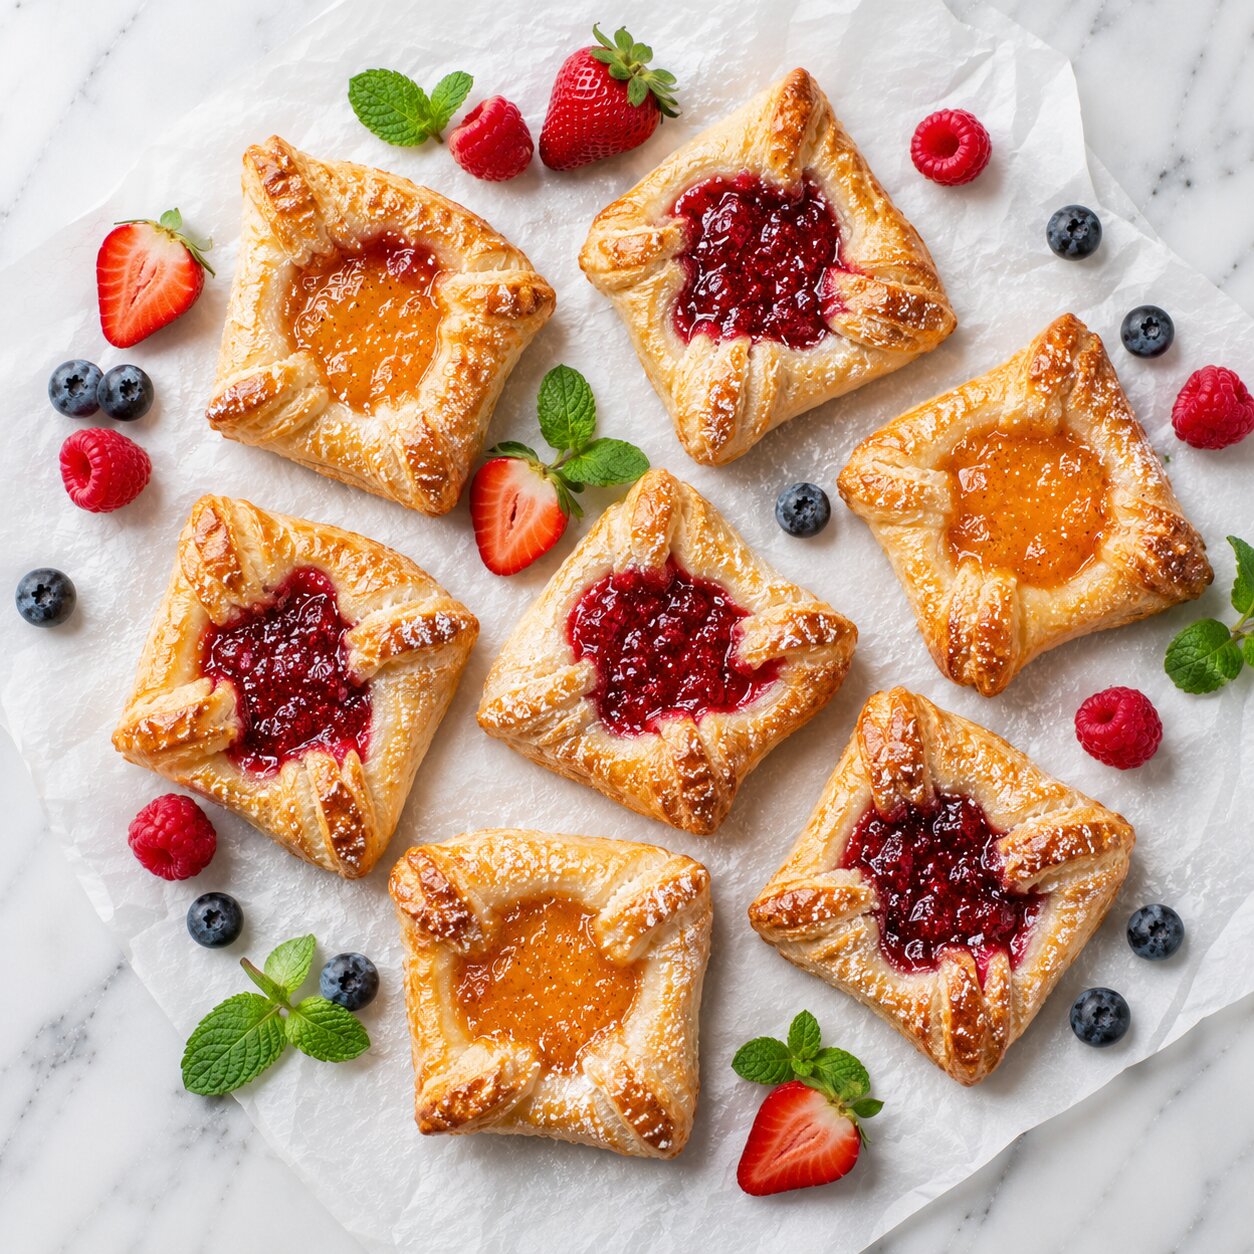
Every household has a memory food — the recipe that is inseparably linked to a specific person, a particular morning, the feeling of something being made with care. For Chellie Helmke of Jackson Center, Ohio, whose recipe inspired this guide, that memory is her father’s favourite: simple jam-filled pastries that were close to his heart and have remained close to hers ever since.
There is something about a properly made danish that earns that kind of emotional significance. The layers of flaky, buttery pastry that shatter slightly at the first bite. The cream cheese filling that is sweet and smooth and just barely set from the heat. The jam that bubbles and caramelises at the edges of the pastry. The golden colour on top from the egg wash that makes the whole thing look like it came from a professional bakery.
This recipe makes all of that possible in 35 minutes with store-bought puff pastry and a handful of pantry ingredients. Eighteen pastries in one session. Ready for a holiday brunch spread, a weekend morning treat, a gift box for a neighbour, or simply Tuesday because sometimes Tuesday deserves a beautiful pastry.
The air fryer is not just a convenience here — it is genuinely the better tool for this recipe. At 325°F, the air fryer’s circulating heat produces a more dramatically puffed, more evenly golden pastry than an equivalent oven setting, in less time, with no need to monitor or rotate. Once you have made these once, the combination of ease and quality means they become a permanent part of the repertoire.
Why This Recipe Works So Well: The Three-Element Philosophy
What makes these particular danishes so consistently successful is the deliberate simplicity of the three-element structure:
Element 1: The Cream Cheese Filling
The filling is cream cheese beaten with sugar, flour, vanilla, and an egg yolk. The egg yolk is the key ingredient that most home cream cheese filling recipes skip — and its absence is why those recipes often produce fillings that are soft, runny, and leak through the pastry folds during cooking.
The egg yolk does two things:
It provides protein that sets during baking. When the pastry goes into the hot air fryer, the egg yolk in the filling begins to coagulate — tightening the cream cheese mixture from soft and spreadable into something that holds its shape and stays within the folded pastry corners.
It adds richness. Egg yolk contains fat and lecithin, both of which produce a noticeably creamier, richer filling than cream cheese and sugar alone. The difference in flavour is immediately detectable.
The flour (2 tablespoons) plays a supporting role — it further stabilises the filling during the heat of cooking, preventing it from becoming too liquid even as the cream cheese warms.
Element 2: The Jam
Seedless raspberry jam is the classic choice — and it is worth understanding why seedless rather than regular, and why seedless specifically over other jam varieties.
Seedless jam melts and caramelises more evenly during cooking because there are no seed pieces that can create localised hot spots or textural inconsistencies in the finished pastry. The jam becomes a glossy, slightly thickened jewel of concentrated fruit flavour at the centre of each danish.
Raspberry specifically provides the right balance of sweetness and tartness against the rich cream cheese. Too sweet a jam (strawberry, apricot) can overwhelm the delicate cream cheese flavour. Too tart (blackcurrant, pure sour cherry) can create an imbalance. Raspberry sits exactly at the right point.
That said — and this is worth emphasising — the recipe works beautifully with any seedless jam you love. See the full jam variation guide below.
Element 3: The Egg Wash
The egg wash (one egg yolk mixed with one tablespoon of water) serves two purposes that are both visible in the finished pastry: it seals the folded corners closed during cooking (preventing them from popping open and releasing the filling), and it produces the deep golden, slightly glazed surface that signals “bakery quality” from across the room.
The seal function is why the egg wash is applied specifically to the overlap point of the folded corners — it is acting as edible glue, not just as a surface treatment. Make sure the overlapping edges are pressed firmly with egg-washed fingertips before each danish goes into the air fryer.
Ingredients: Complete List (Makes 18 Danishes, Serves 6-9)
For the Cream Cheese Filling
- 1 package (8 oz / 225g) cream cheese, fully softened to room temperature
- ¼ cup granulated sugar
- 2 tablespoons all-purpose flour
- ½ teaspoon pure vanilla extract
- 1 large egg yolk (from the 2 yolks used in this recipe — the other goes into the egg wash)
For the Pastry
- 1 package (17.3 oz / 490g) frozen puff pastry (2 sheets), fully thawed but still cold
- ⅔ cup seedless raspberry jam (or jam of choice — approximately 1 rounded teaspoon per danish)
For the Egg Wash
- 1 large egg yolk (the second of the 2 used)
- 1 tablespoon water
The Puff Pastry Guide: Getting This Right From the Start
Puff pastry is the ingredient most likely to cause first-time disappointment in this recipe — not because it is difficult to work with, but because most people do not know the two critical handling rules that make the difference between properly puffed, flaky pastry and flat, dense, buttery squares.
Rule 1: Thaw Cold, Work Cold
Frozen puff pastry must be thawed before using — it will crack and tear if you try to work with it while frozen. But “thawed” and “warm” are very different states, and the distinction matters enormously.
Puff pastry is laminated dough — dozens of alternating layers of dough and butter, created by repeatedly folding and rolling the pastry. The characteristic puff and flakiness come from those butter layers: when the butter hits the hot air fryer, it melts and creates steam, which pushes the dough layers apart and causes the dramatic rise.
If the pastry is warm when it goes into the air fryer, the butter layers have already started to soften and merge — the distinct layers are compromised before cooking even begins. The result is a pastry that puffs moderately and feels slightly dense and greasy rather than dramatically flaky and light.
The correct state for working with puff pastry: thawed enough to unfold cleanly and roll without cracking, but still cold to the touch — you should be able to feel the chill through the dough.
Thawing method: Transfer from freezer to the refrigerator 4-6 hours before using, or leave at room temperature for 30-40 minutes. The refrigerator method is more reliable for maintaining the cold temperature while ensuring full thaw.
Rule 2: Handle Minimally and Quickly
Every additional minute the pastry spends in your warm hands raises the temperature of the butter slightly. Cut, fill, fold, and refrigerate any assembled pastries that are waiting for their turn in the air fryer. Do not leave them at room temperature while you work through a large batch.
Step-by-Step: How to Make Air Fryer Puff Pastry Danishes
Step 1 — Make the Cream Cheese Filling
The cream cheese must be at genuine room temperature before beating — not slightly cool, not taken out 5 minutes ago, but soft enough that when you press a finger into it, it leaves a clean impression with no resistance. Cold cream cheese does not beat smooth; it remains lumpy and creates an uneven filling texture.
In a medium bowl, beat the softened cream cheese with a hand mixer or stand mixer on medium speed until completely smooth — approximately 1 minute. Add the sugar, flour, vanilla extract, and one egg yolk. Beat on medium speed for another 60-90 seconds until the mixture is perfectly smooth, slightly fluffy, and uniform in colour with no visible streaks of egg yolk.
No mixer? A wooden spoon and vigorous manual beating works if the cream cheese is thoroughly softened. The process takes 3-4 minutes by hand rather than 2 minutes with a mixer — but the result is identical.
Set the filling aside at room temperature while you prepare the pastry.
Step 2 — Make the Egg Wash
Combine the second egg yolk with 1 tablespoon of water in a small bowl. Whisk until smooth and the yolk is fully incorporated. Set aside with a pastry brush or small spoon ready to use.
Step 3 — Prepare the Puff Pastry
Remove the thawed puff pastry from the refrigerator. Lightly flour a clean work surface — just enough to prevent sticking, not so much that the surface flour absorbs into the dough and affects the texture.
Unfold the first puff pastry sheet and roll gently with a rolling pin to a 12-inch square — this is a light roll, approximately 20-30% of the pressure you would use with pie crust, just enough to smooth the fold lines and even the thickness slightly. Do not press hard enough to compress the butter layers.
Using a sharp knife or pizza cutter, cut the 12-inch square into a 3×3 grid of nine 4-inch squares. A sharp, clean cut (not a dragging, sawing motion) preserves the clean layers at the edges and ensures maximum puff at the cut sides.
Repeat with the second puff pastry sheet, giving you 18 squares total.
Step 4 — Fill and Fold
Working with one square at a time:
Place one square flat on the work surface with one corner pointing toward you — in diamond orientation, not square orientation. This is important: diamond orientation gives you the correct geometry for the corner fold.
Spoon approximately 1 tablespoon of cream cheese filling into the centre of the square. Keep it within a roughly 2-inch area in the centre — you need the edges clear for folding. Spread it gently rather than pressing hard.
Add 1 rounded teaspoon of jam on top of the cream cheese, nestling it in the centre.
The fold: Take the corner closest to you and fold it away from you toward the far corner. Take the corner farthest from you and fold it toward you over the first. The two folded corners should overlap at the centre, covering the filling completely. Press the overlapping area firmly with a fingertip dipped in the egg wash — this is the seal that keeps the danish closed during cooking.
Place the assembled danish on a plate or tray. Brush the entire top surface (the folded pastry exterior) with a light, even coat of the remaining egg wash. Do not apply so thickly that it pools in the folds — a thin, even coat is what produces a golden glaze rather than a yellowed, thick coating.
Repeat with remaining squares.
Step 5 — Refrigerate While Preheating
Refrigerate the assembled danishes for 10-15 minutes while you preheat the air fryer. This brief chill re-firms the butter in the pastry that softened slightly during handling — the cold butter going into a preheated air fryer is what produces the most dramatic puff.
Preheat the air fryer to 325°F (163°C) for 5 minutes. This temperature is notably lower than most air fryer recipes — and specifically chosen because puff pastry at higher temperatures browns too quickly on the outside before the layers have time to puff fully. The slightly lower temperature allows the steam from the butter to build gradually, creating the maximum number of visible flaky layers.
Step 6 — Air Fry in Batches
In batches, arrange danishes in a single layer in the greased air fryer basket. Standard basket-type air fryers hold approximately 4-6 danishes per batch depending on size. Do not crowd — the pastry puffs significantly during cooking and pieces that are touching will merge at the edges.
Grease the basket lightly with cooking spray or brush with a small amount of oil before each batch. Puff pastry can stick if the basket is not prepared, and any sticking can tear the delicate layers when you try to remove the pastry.
Air fry at 325°F for 8-10 minutes until the pastry is puffed, deeply golden across the surface, and the egg wash has set to a glossy golden glaze. The danishes will have risen dramatically from their flat assembled state — this visual transformation is one of the most satisfying moments in pastry cooking.
The done signal: The pastry should look golden (not pale, not brown — golden) and feel firm when gently pressed. If a finger leaves an impression that fills back in slowly, give it another minute. If it springs back immediately, it is done.
Step 7 — Serve Warm
Transfer to a plate or cooling rack and serve warm. These danishes are at their absolute best within the first 20 minutes of coming out of the air fryer — the pastry is at peak crispness, the cream cheese filling is still slightly warm and soft, and the jam is at its most glossy and fragrant.
For subsequent batches: the air fryer is now hot, so reduce the cooking time by 1 minute for each subsequent batch.
Jam Filling Guide: Choosing and Using the Right Jam
The cream cheese filling is constant; the jam is where the personality of the danish lives. Here is a complete guide to choosing and using different jam options:
Classic Choices
| Jam | Flavour Character | Best Paired With | Notes |
|---|---|---|---|
| Seedless raspberry | Tart-sweet, bright | Cream cheese | The gold standard; perfectly balanced |
| Strawberry (seedless) | Sweet, mild | Cream cheese | More approachable; great for children |
| Apricot | Sweet, mildly tangy | Cream cheese + almond | Classic European pastry pairing |
| Blueberry | Deep, earthy sweet | Cream cheese | Beautiful colour; stunning presentation |
| Cherry | Bright, slightly tart | Cream cheese | Summer brunch version; use sour cherry for sophistication |
Adventurous Options
- Fig jam — pairs beautifully with a pinch of black pepper in the cream cheese filling
- Peach preserves — summer sweetness; use seedless or strain before using
- Mango jam — bright, tropical; especially good with a pinch of cardamom in the filling
- Passion fruit curd — not a jam but works identically; intensely flavoured
Savoury Direction (For Guests Who Prefer Less Sweet)
Replace the jam entirely with a thin smear of caramelised onions or sun-dried tomato pesto. Skip the sugar in the cream cheese and add a pinch of herbs instead. This savoury danish variation works surprisingly well as a pre-dinner appetiser.
5 Variations That Transform the Recipe
Variation 1 — Nutella and Cream Cheese
Replace the jam with 1 teaspoon of Nutella per danish. The chocolate-hazelnut spread melts into the cream cheese during cooking and creates a rich, indulgent centre. Add a small whole hazelnut on top of the Nutella before folding for texture.
Variation 2 — Lemon Curd Danishes
Replace the jam with lemon curd (same quantity, same placement). Add 1 teaspoon of lemon zest to the cream cheese filling. The bright, tart lemon against the sweet cream cheese filling is particularly beautiful. Dust with powdered sugar immediately after air frying.
Variation 3 — Apple Cinnamon Danishes
Replace the jam with 1 teaspoon of apple butter. Add ¼ teaspoon of ground cinnamon and a pinch of nutmeg to the cream cheese filling. These taste like apple pie in danish form — particularly good for autumn gatherings.
Variation 4 — Brown Sugar and Almond Danishes
Replace the granulated sugar in the cream cheese filling with brown sugar. Replace the vanilla with almond extract (¼ teaspoon — almond is more potent). Add ½ teaspoon of finely chopped toasted almonds to the top of each assembled danish before air frying. Brush with a simple powdered sugar glaze (2 tablespoons powdered sugar + 1 teaspoon milk) after cooking.
Variation 5 — Chocolate Cream Cheese Danishes
Beat 1 tablespoon of good cocoa powder and 2 tablespoons of additional sugar into the cream cheese filling. Replace the jam with a few dark chocolate chips placed directly on the cream cheese before folding. The chocolate chips melt into pools inside the pastry.
What Makes These Perfect for Special Occasions
These danishes serve a specific social purpose that makes them valuable in a way that most baked goods are not — they are simultaneously visually impressive, genuinely delicious, and practically straightforward to make in large quantities.
For holiday brunch spreads: A tray of eighteen golden danishes with jam centres — raspberry, blueberry, apricot, three different fillings lined up in rows — is a centrepiece that looks professional and produces genuine reactions from guests. And because the recipe scales simply (additional puff pastry sheets, proportionally more filling), doubling or tripling for a large gathering is entirely straightforward.
For gifting: Danishes travel well in a single layer in a box — unlike frosted cupcakes or cream-filled items that squash or smear. A box of six to eight in mixed jam flavours, tied with a ribbon, is a thoughtful, genuinely made food gift.
For weekday mornings: The recipe makes 18 at one time. What does not get eaten warm from the air fryer can be refrigerated and reheated the next morning. Or frozen (see storage guide below). For a household of four, this recipe provides breakfast pastries for most of a week.
Storage, Reheating, and Freezing
Room temperature: The danishes are best eaten within 2-3 hours of cooking. Left at room temperature, the pastry softens slightly as moisture from the filling migrates outward.
Refrigerator: Store in an airtight container for up to 4 days. The pastry will soften in the refrigerator.
Reheating: The air fryer is the best method — 325°F for 3-4 minutes restores significant crispness to the pastry layers. The oven at 350°F for 5-7 minutes also works well. Avoid the microwave — it makes puff pastry chewy and dense.
Freezing cooked danishes: Cool completely, place in a single layer on a baking sheet to freeze until solid, then transfer to a zip-lock bag for up to 2 months. Reheat from frozen in the air fryer at 325°F for 6-8 minutes.
Freezing unbaked assembled danishes: Arrange on a baking sheet, freeze until solid, then transfer to a bag. Air fry directly from frozen at 325°F for 12-14 minutes. This produces the crispest possible result of all the storage approaches.
Nutrition Information (Per Danish)
| Nutrient | Amount |
|---|---|
| Calories | 197 kcal |
| Fat | 12g |
| Saturated Fat | 4g |
| Cholesterol | 33mg |
| Sodium | 130mg |
| Carbohydrates | 20g |
| Fiber | 2g |
| Sugar | 3g |
| Protein | 3g |
At 197 calories per danish, this is a breakfast pastry that fits comfortably within a balanced morning meal — particularly when served alongside protein (eggs, yogurt) and fruit. The puff pastry accounts for the majority of the fat content; the cream cheese filling, despite its rich flavour, is a relatively small proportion of the total.
Expert Tips for Pastry Perfection
Room temperature cream cheese is not negotiable. Cold cream cheese will not beat smooth. Take it out of the refrigerator at least 45 minutes before starting. If you are short on time, cut it into small cubes and let it sit for 20 minutes — smaller pieces warm faster.
Keep assembled danishes refrigerated while you work. Do not leave them at room temperature during the time between assembly and cooking. Batch them up, refrigerate, and cook group by group.
Use 325°F, not higher. The temptation to cook pastry at higher temperatures to save time is understandable, but puff pastry at 400°F browns on the outside before the interior has puffed, producing a dark, dense result. At 325°F, the steam builds gradually, creating maximum layers.
Do not overfill. A tablespoon of cream cheese and a rounded teaspoon of jam is the maximum. Overfilling causes the filling to leak through the sealed corners and create sticky, messy pastries that stick to the basket.
Grease the basket for every batch. Puff pastry contains a significant amount of butter that cooks into the basket surface — residue from the first batch can cause the second to stick. A light spray between batches prevents this entirely.
Serve within 20 minutes. The window of optimal crispness for puff pastry danishes is short. Serve them from the air fryer basket directly to the plate as quickly as possible.
Frequently Asked Questions
Q1. Can I make these in a regular oven instead of an air fryer?
Yes — the oven method works very well for this recipe. Preheat the oven to 350°F (175°C). Line baking sheets with parchment paper and arrange the assembled danishes with space between them. Bake for 16-18 minutes until golden, rotating the sheet pan once at the halfway point. The air fryer produces slightly more dramatic puffing (the circulating hot air reaches all sides simultaneously), but the oven version is equally delicious and has the advantage of cooking a full batch of 18 simultaneously rather than in batches.
Q2. Can I use crescent roll dough instead of puff pastry?
Yes, though the result will be different in texture — crescent roll dough produces a softer, more bread-like, less dramatically flaky result than laminated puff pastry. The folding technique is the same; reduce the cooking time slightly (6-8 minutes rather than 8-10) as crescent dough cooks faster. For the most authentically Danish flavour and texture, puff pastry is the correct choice.
Q3. Why are my danishes not puffing up properly?
The two most likely causes: the puff pastry was too warm when it went into the air fryer (warm butter layers do not create the necessary steam burst that drives the puff), or the pastry was overhandled and the butter layers were compressed rather than kept distinct. Next time, keep the pastry cold throughout assembly, work quickly, and refrigerate assembled danishes for at least 10-15 minutes before cooking. Start with a well-chilled pastry every time.
Q4. Can I make the cream cheese filling ahead of time?
Yes — the cream cheese filling can be made up to 2 days ahead and stored in an airtight container in the refrigerator. Take it out 10-15 minutes before assembling the danishes to let it soften slightly (cold filling is harder to spoon neatly). Do not make the full assembled danishes ahead and store them unfilled — the moisture from the jam can begin softening the pastry overnight.
Q5. What is the difference between these danishes and a Starbucks cheese danish?
The Starbucks cheese danish uses a slightly simpler cream cheese filling (cream cheese, sugar, vanilla) without the egg yolk and flour stabilisers in this recipe. The Starbucks version also typically uses a different pastry format (a single folded square rather than two overlapping corners). The filling in this recipe is noticeably richer and better set from the egg yolk addition. The jam is an additional element entirely absent from the classic Starbucks version. Many home cooks specifically make this recipe as a superior, homemade alternative to the Starbucks version — the result genuinely outperforms the commercial product in both flavour and texture.
The Pastry That Earns Its Place at Every Table
Some recipes become fixtures in a household not because they are the most ambitious thing ever attempted, but because they are the most consistently rewarding. They produce genuine delight every time — from the household member who sees them coming out of the air fryer to the guest who reaches for a second before commenting on the first.
Puff Pastry Danishes earned that status in Chellie Helmke’s family through her father’s lifelong preference for them. They can earn the same status in yours — made in 35 minutes with store-bought pastry and a cream cheese filling that takes five minutes to prepare.
Make them this weekend for the people at your table, and tell us in the comments how they turned out. Which jam you chose, whether you tried a variation, and whether anyone asked you to make them again before the plate was even empty. We read every comment — and the best suggestions from home bakers often improve the recipe for everyone else.
Pairs perfectly with: Morning Coffee | Hot Tea | Fresh Fruit Salad | Orange Juice | Holiday Brunch Spread
Also explore: Air Fryer French Toast Sticks | Air Fryer Breakfast Egg Rolls | Air Fryer Puff Pastry Twists | Homemade Croissants