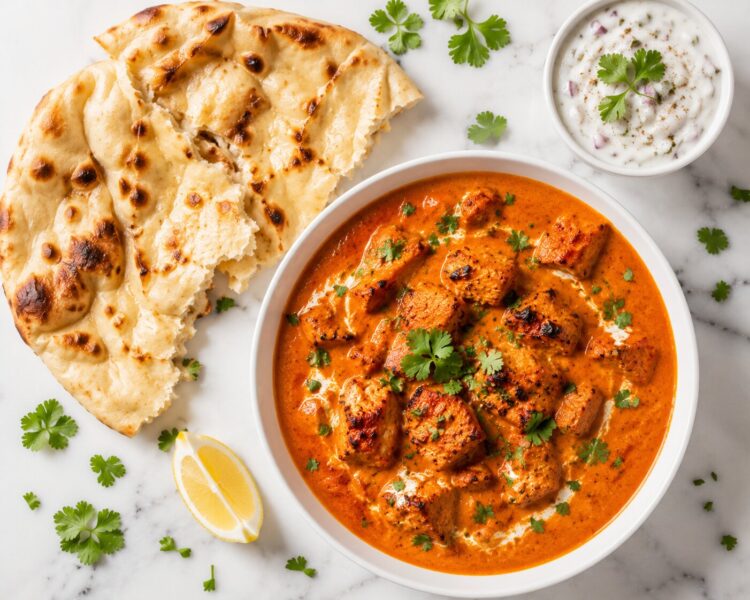
There is a specific kind of satisfaction in pulling a takeaway container of Chicken Tikka Masala from a bag on a Friday night. The orange-red sauce. The tender, slightly smoky chicken. The way it tastes even better than you remembered from last time.
And then there is the other kind of satisfaction — the one that comes from making it yourself, in your own kitchen, knowing exactly what went into it, for less money, and with results that genuinely rival the restaurant version.
Air Fryer Chicken Tikka Masala gives you that second kind of satisfaction without asking too much of you in return. Think of your air fryer as a small tandoor — air fryers don’t actually fry at all; they are much closer to a tandoor oven than they are a frying pan. That insight changes how you approach this dish entirely. The charred, spice-crisped exterior on the tikka pieces — the quality that makes restaurant CTM so distinctive — is not the exclusive property of a professional tandoor. It is achievable at home, in the same appliance you use to make chips on a Tuesday night.
This recipe delivers the full two-component experience that defines great Chicken Tikka Masala: boneless chicken pieces marinated in a yogurt-spice mixture and air fried until authentically charred; then folded into a rich, silky tomato-cream sauce built from scratch with aromatics, whole spices, and finished with cream. Every component made in your kitchen. Better than most takeaway versions. Genuinely yours.
What Is Chicken Tikka Masala — and Why Does It Deserve More Respect?
Chicken Tikka Masala is a mouthwatering combination of tender char-grilled chicken in a fragrant and creamy onion and tomato sauce. Tikka translates as small chunks — in this case, diced chicken that is first marinated in spiced yogurt then cooked in a tandoor until wonderfully tender. Masala refers to the sauce made with tomatoes, onions, spices and finished with cream.
The dish has roots in India and Anglo-Indian influences — the masala sauce having been added to satisfy the British palate by an Indian chef in Glasgow. Whether you consider it an Indian dish adapted for Western tastes or a British invention with Indian DNA, its status is undeniable: it became so popular in the United Kingdom that it was at one point described as Britain’s most-ordered restaurant dish.
The Two-Stage Structure That Makes CTM Unique
Most curries are single-pot affairs — protein and sauce cooked together from the start. Chicken Tikka Masala is different. It is built in two separate stages that are then united at the end:
Stage 1 — The Tikka: Chicken marinated in yogurt and spices, cooked at high heat until charred and slightly caramelised on the surface. This is where the smokiness comes from. This is what makes it tikka, not just chicken curry.
Stage 2 — The Masala: A rich, aromatic sauce of onions, tomatoes, garlic, ginger, spices, and cream, built separately from the chicken and simmered until velvety.
The union: The charred tikka pieces are added to the masala sauce in the final stage, where they absorb the curry’s depth while contributing their own smoky character to the sauce. The result is a dish with more layers of flavour than either component could produce alone.
The air fryer handles both stages beautifully — and the sauce darkens and caramelises on top in the air fryer, which can be stirred in for more flavour — something that won’t happen in a slow cooker.
Why the Air Fryer Is Ideal for This Dish
The air fryer’s most useful quality for CTM is its versatility. For extra charred crispiness, air fry the diced chicken chunks for a few minutes at high heat before adding to the sauce. You can also use the same appliance to heat and finish the sauce, making this a genuinely one-appliance curry.
In this method of air frying curries, you simply heat the sauce for about 15 minutes until it is hot enough to serve. You don’t need it to be splattering and spitting — splatter is not a problem.
| Method | Tikka Char | Sauce Quality | Cleanup | Time |
|---|---|---|---|---|
| Air fryer (this recipe) | Excellent | Very good | Minimal | 45 min |
| Traditional stovetop | Good | Excellent | Moderate | 60-75 min |
| Slow cooker | None | Good | Easy | 4-6 hours |
| Oven | Moderate | Good | Moderate | 60 min |
Ingredients (Serves 4)
For the Chicken Tikka Marinade
- 600g / 1.3 lb boneless chicken breast or thighs, cut into 2-inch cubes
- 4 tablespoons thick Greek yogurt (hung curd)
- 1½ tablespoons ginger-garlic paste (freshly made preferred)
- 1 teaspoon Kashmiri red chili powder — for deep colour, mild heat
- 1 teaspoon cayenne or regular red chili powder — for actual heat (adjust to taste)
- 1 teaspoon ground coriander
- 1 teaspoon garam masala
- 1 teaspoon ground cumin
- ½ teaspoon turmeric powder
- 1 teaspoon kasuri methi (dried fenugreek leaves), crushed
- 2 teaspoons chickpea flour (besan) — helps the marinade form a crisp crust
- 1 teaspoon lemon juice
- 1 teaspoon neutral oil
- Salt to taste
For the Masala Sauce
- 2 tablespoons ghee (or neutral oil)
- 1 teaspoon cumin seeds
- 2 medium onions, very finely chopped or processed to a paste
- 1½ tablespoons ginger-garlic paste
- 1 green chili, slit
- 2 medium ripe tomatoes, finely chopped (or 1 × 400g tin chopped tomatoes)
- 1 teaspoon Kashmiri red chili powder
- 1 teaspoon ground coriander
- 1 teaspoon garam masala
- ½ teaspoon turmeric powder
- ½ teaspoon ground cumin
- 1 teaspoon tikka curry powder (optional, adds depth)
- 1 teaspoon brown sugar (balances acidity of tomatoes)
- 150ml / ½ cup single cream (or double cream for richer sauce)
- Salt to taste
- Fresh coriander for garnish
Optional Sauce Additions
- 2 tablespoons cashew paste — blended soaked cashews; adds body and richness
- 1 tablespoon butter — stirred in at the end for extra gloss
- 1 teaspoon mango chutney — balances sourness with a touch of sweet
Key Ingredient Notes
Kashmiri Red Chili — Colour vs Heat
This is the most important ingredient distinction in tikka masala cooking. Kashmiri red chili provides the characteristic deep, restaurant-red colour with very minimal heat. Regular red chili powder at the same quantity will be dramatically spicier. If Kashmiri chili is unavailable, sweet paprika is the correct substitute — not regular chili powder.
Besan in the Tikka Marinade
Hung curd is a must for making good quality chicken tikka, as it makes all the spices and aromatics stick beautifully to the meat. The chickpea flour (besan) amplifies this by absorbing excess moisture from the yogurt, preventing the marinade from running off during cooking and helping form the characteristic charred crust.
Cream Choices
Evaporated milk instead of cream in this curry is actually preferred by some cooks. It adds creaminess with fewer calories than double cream and holds up better during reheating without splitting. Coconut cream works for a dairy-free version and adds its own complementary sweetness.
Ghee vs Oil for the Sauce
Ghee gives the curry its rich flavour, though oil works just fine too. If using oil, a neutral oil like sunflower or canola is appropriate. Ghee produces a noticeably deeper, more rounded flavour in the finished sauce — particularly at the onion-frying stage.
Step-by-Step: How to Make Air Fryer Chicken Tikka Masala
Stage 1 — Marinate the Chicken (2 Hours to Overnight)
Pat the chicken pieces completely dry with kitchen paper. Combine all marinade ingredients in a large bowl and mix into a uniform paste. Add the chicken and toss until every surface is fully coated — using your hands is the most effective method.
Cover and refrigerate for a minimum of 2 hours. The longer you leave the chicken to marinate, the more delicious the tikka will be. 24 hours is the ideal amount of time for the flavours to really penetrate the chicken. If cooking the same day, 2 hours is the practical minimum.
Timing tip: Start the marinade the evening before and refrigerate overnight. The morning of serving, make the masala sauce and refrigerate it. When ready to eat, air fry the tikka, combine everything, and heat through. The entire active cooking time on the day is under 30 minutes.
Stage 2 — Air Fry the Tikka
Remove the marinated chicken from the refrigerator 20-30 minutes before cooking — bringing it closer to room temperature ensures more even cooking throughout.
Preheat the air fryer to 200°C / 400°F for five minutes. Mist the basket with oil and add the chicken. Arrange the pieces in a single layer, leaving space between each piece so hot air can circulate fully. Overcrowding is the number one cause of steamed rather than charred tikka.
Air fry for 12-15 minutes, flipping once halfway through. The chicken tikka should be cooked and slightly charred. Check the internal temperature — it should read 165°F / 74°C at the thickest point.
Set the cooked tikka aside while you make or heat the sauce.
The charring is intentional. Several home cooks new to tikka cooking worry about the dark edges on their air-fried chicken. This is the Maillard reaction at work — the browning and slight caramelisation that creates the complex, smoky flavour that distinguishes tikka from plainly cooked chicken. Do not try to avoid it; it is the point of the high-heat cooking.
Stage 3 — Build the Masala Sauce (Stovetop Method)
Heat the ghee in a heavy-bottomed pan over medium heat. Add the cumin seeds and let them splutter for 30-40 seconds until deepened in colour and fragrant. Add the finely chopped onions.
Cook the onions, stirring regularly, for 10-12 minutes until deeply golden — not pale, not dark brown, but a rich, even amber. This is the longest step and the most important one: properly caramelised onions create a natural sweetness and body in the sauce that cannot be replicated by quickly softened onions.
Add the ginger-garlic paste and green chili. Stir continuously for 60-90 seconds until the raw smell disappears.
Add the chopped tomatoes. Cook over medium heat for 8-10 minutes, stirring regularly, until the tomatoes break down completely and the mixture becomes a thick, glossy, unified masala — not a collection of separate tomato pieces. The oil should begin to separate visibly at the edges: this is the crucial sign that the base is ready.
Add all the dry spice powders — Kashmiri chili, coriander, garam masala, turmeric, cumin, tikka powder, and brown sugar. Stir immediately and cook for 60 seconds.
At this point, use an immersion blender directly in the pan to blend the sauce until mostly smooth. This creates a restaurant-quality consistency. Alternatively, blend in batches in a counter blender, then return to the pan.
Add 100ml of water, stir, and simmer for 5 minutes. The sauce should be thick, rich, and glossy.
Stage 4 — Combine and Finish
Add the cooked tikka pieces to the sauce. Stir gently to coat every piece. Stir in the cream and heat through for five minutes.
Taste carefully. If the curry tastes very tangy, add ½ tsp sugar to balance out the flavours. Adjust salt. If you want a richer finish, stir in a tablespoon of cold butter at the very end — this creates an emulsified, restaurant-glossy sauce.
Garnish with fresh coriander. Serve immediately.
Air Fryer Method for the Sauce (Fully One-Appliance Version)
If you want to build the entire dish in the air fryer: if your air fryer has a sauté function, feel free to use that instead of air frying the base curry ingredients.
Without a sauté function: place the finely chopped onions, ginger-garlic paste, tomatoes, and dry spices in the air fryer basket with the ghee. Cook in the air fryer for 15-20 minutes, stirring halfway. Use a stick blender to blitz until smooth, then add the cream, combine with the tikka pieces, and return to the air fryer at 180°C for 5-8 minutes to heat through.
What to Serve with Air Fryer Chicken Tikka Masala
The accompaniments transform CTM from a curry into a complete meal:
Classic pairings:
- Pilau rice — fragrant basmati with whole spices; absorbs the sauce beautifully
- Garlic naan — the most popular restaurant accompaniment; ideal for scooping
- Plain basmati rice — simple, lets the curry do the talking
- Chapati or whole wheat roti — lighter, everyday choice
For a complete feast spread:
- Cucumber raita — cooling contrast to the richness of the sauce
- Mango chutney — sweet-fruity balance to the savoury curry
- Papad / poppadom — texture and crunch
- Thinly sliced onion with mint — fresh, sharp, palate-cleansing
Creative uses for leftovers:
- Sandwiches or burgers incorporating chicken tikka, along with lettuce, tomatoes, onions, and a dollop of raita or mayo for a flavourful twist
- Pizza topping — chicken tikka combined with cheese, onions, and bell peppers, baked until the crust is golden
- Tikka masala toastie — fill a sandwich, grill until crisp
- Wrap with shredded lettuce, pickled onions, and yogurt
Expert Tips for Restaurant-Quality Results
The overnight marinade is worth planning for. The flavour difference between 2-hour marinated tikka and overnight-marinated tikka is significant and immediately noticeable. The spices penetrate deeper, the yogurt tenderises more thoroughly, and the kasuri methi has time to bloom fully.
Blend the masala sauce. The difference between a roughly textured sauce and a smooth, velvety masala is simply running a stick blender through the cooked onion-tomato base before adding cream and chicken. This one step produces the silky consistency people associate with restaurant CTM.
Watch the onion colour carefully. Too pale and the sauce lacks sweetness and body. Too dark and it becomes bitter. Deep golden amber is the target, and it takes a genuine 10-12 minutes — not the 3-4 minutes that rushing suggests.
Add cream off the heat (or on low). High heat curdles cream. If using cream, lower the heat and stir in the cream. Simmer the curry for a couple of minutes. Once the cream is added, keep the heat on its lowest setting.
All curries taste better the day after they are cooked. Make the entire recipe ahead, refrigerate overnight, and reheat gently the following day. The flavours meld, deepen, and round out in a way that freshly made curry simply cannot replicate.
Spice Level Guide
One of CTM’s great virtues is how easily its heat level adjusts:
| Heat Level | Kashmiri Chili | Regular Chili | Green Chili | Good For |
|---|---|---|---|---|
| Very Mild | 1 tsp | None | None | Children, heat-sensitive guests |
| Mild | 1 tsp | ½ tsp | None | Kids who avoid most spicy foods |
| Medium (this recipe) | 1 tsp | 1 tsp | 1 slit chili | Most adult palates |
| Hot | 1 tsp | 1½ tsp | 2 chilies | Spice lovers |
| Very Hot | 1 tsp | 2 tsp | 3 chilies + cayenne | For the brave |
The Kashmiri chili amount stays consistent across all heat levels — it provides colour, not heat. Only the cayenne/regular chili and green chili change.
Storage, Freezing, and Reheating
Refrigerator: Store any leftovers in a glass container in the refrigerator for up to four days. Leftovers taste even better the next day. Dilute the curry with a little water and heat through before serving.
Freezer: You can also freeze the curry for up to three months. Cool completely and portion into suitable containers, allowing a little space for the curry to expand as it freezes. Reheat until piping hot throughout before serving.
Reheating options:
- Air fryer: 180°C / 350°F for 5-8 minutes — the sauce may dry slightly; add 2-3 tablespoons of water before heating
- Stovetop: Medium-low heat with a splash of water or stock; stir regularly
- Microwave: Cover and heat in 60-second intervals, stirring between each
Make-ahead strategy: You can make the chicken and/or masala sauce in advance and combine the two when you are ready. The sauce stores refrigerated for up to 3 days before adding tikka; the marinated raw chicken keeps refrigerated for up to 24 hours before air frying.
Variations Worth Trying
Vegetarian / Vegan: Paneer or Tofu Tikka Masala
Replace chicken with 400g firm paneer or extra-firm pressed tofu. Use the same marinade. Air fry at 400°F for 8-10 minutes (paneer needs less time than chicken). Fold into the masala sauce the same way. For a fully vegan version, use plant-based yogurt in the marinade and coconut cream in the sauce.
Prawn / Shrimp Tikka Masala
Marinate 500g large raw prawns in the same spice mixture (30 minutes maximum — acid in the lemon juice will begin breaking down the delicate proteins if left longer). Air fry at 400°F for just 5-6 minutes. Combine with masala sauce immediately before serving.
Cauliflower Tikka Masala (Fully Vegan)
Cut a large cauliflower into substantial florets. Coat in the tikka marinade (using coconut yogurt) and air fry at 400°F for 15-18 minutes until the edges are deeply golden and slightly charred. Add to the masala sauce with 1 tin of chickpeas for protein.
Richer Restaurant Version
Add 2 tablespoons of cashew paste (blend 15 soaked cashews with 3 tablespoons water until completely smooth) to the sauce alongside the cream. This produces the extra-velvety, restaurant-style body that takes CTM from great to extraordinary.
Healthier Version
Replace double cream with full-fat coconut milk or evaporated skimmed milk. Use chicken thighs rather than breast for more flavour with similar calorie content. The nutritional profile improves meaningfully while the flavour remains excellent.
Frequently Asked Questions
Q1. Can I make the entire Chicken Tikka Masala in the air fryer, including the sauce?
Yes — if your air fryer has a sauté function, feel free to use that for the base curry ingredients. You can also simply heat the prepared sauce in the air fryer for about 15 minutes until it is hot enough to serve. For the full one-appliance method: air fry the onion-tomato masala base first (15-20 minutes at 180°C, stirring halfway), blend until smooth, add cream and tikka chicken, return to the air fryer for 5-8 minutes to heat through. The sauce caramelises on top, which adds extra flavour when stirred in.
Q2. Is air fryer Chicken Tikka Masala spicy?
Chicken Tikka Masala is a relatively mild to moderately hot curry and you can always adjust the spice levels to suit. The Kashmiri red chili in the recipe provides deep colour with very minimal heat. The actual spice level is controlled by the cayenne or regular chili powder, which can be reduced or eliminated entirely for a completely mild version. You can add some crushed chili flakes to garnish for an extra bit of heat for those who want more at the table.
Q3. Do I have to marinate the chicken overnight?
No — 2 hours is the practical minimum for acceptable results. However, the longer you leave the chicken to marinate, the more delicious the tikka will be. 24 hours is the ideal amount of time for the flavours to really penetrate the chicken. If pressed for time, even 30-60 minutes produces surface-level flavour that is better than no marination at all. Plan the overnight soak when you can — the quality difference is genuinely noticeable.
Q4. Why did my cream split when I added it to the curry?
Cream splits when exposed to high heat too quickly, particularly if the sauce is acidic (from the tomatoes) and very hot at the point of adding cream. The fix: reduce the heat to low (not medium, not medium-low — low) before adding cream, and add it gradually rather than all at once, stirring continuously as you pour. Never allow the sauce to boil after cream has been added — a gentle simmer for 2-3 minutes is sufficient.
Q5. Can I use tikka paste from a jar instead of making the marinade from scratch?
Yes — several good-quality commercial tikka marinades exist (Patak’s, TRS, and similar brands are widely available). Use 3-4 tablespoons in place of the individual spice marinade. The flavour will be slightly less nuanced but perfectly acceptable, and it reduces the preparation time significantly. For the masala sauce, making from scratch is more important — the jarred curry sauces tend to be thinner and less complex than a properly made onion-tomato base.
The Takeaway Experience, Made at Home
Chicken Tikka Masala earns its status as one of the world’s most loved curries not through complexity — it is ultimately yogurt-marinated chicken in a tomato-cream sauce — but through the specific flavour layering that happens when you build each component with care and then bring them together.
The air fryer makes this genuinely accessible on a weeknight. The charred tikka happens automatically. The sauce comes together in 25 minutes. The combination is deeply satisfying, thoroughly achievable, and almost certainly better than the last version you ordered from outside.
Make this recipe and share your results below! Tell us whether you made the sauce in the air fryer or on the stovetop, what heat level you went with, and how it compared to your usual takeaway order. And if someone in your household declared it better than the restaurant — which happens often — we want to hear that too.
Pairs perfectly with: Garlic Naan | Pilau Rice | Cucumber Raita | Mango Chutney | Papadom | Fresh Coriander
Also explore: Air Fryer Chicken Tikka | Air Fryer Paneer Tikka | Air Fryer Butter Chicken | Homemade Naan