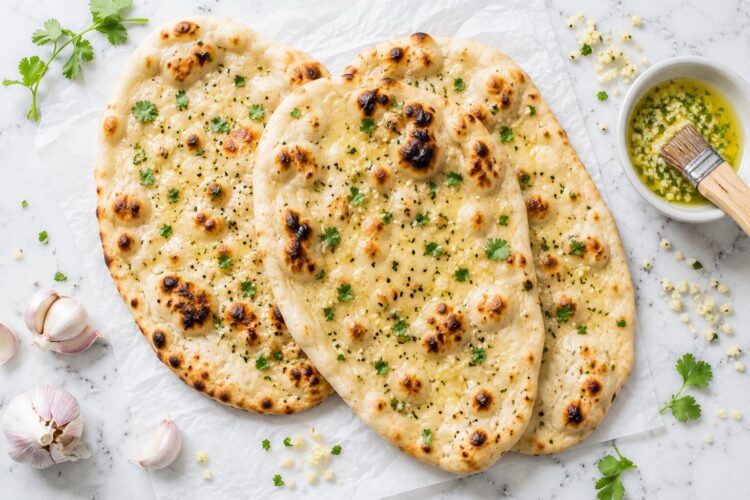
If there is one thing that can make an already great Indian meal feel genuinely special, it is a basket of freshly made garlic naan landing on the table while it is still warm and glistening.
The kind where the surface is blistered and slightly charred in places. Where the butter has soaked into the crevices. Where you can smell the garlic and herbs the moment the cloth is lifted. That kind of naan — the one you get at a good Punjabi restaurant or a dhaba that takes its bread seriously — is not the exclusive preserve of a clay tandoor oven or a professional kitchen.
You can make it at home. On a regular stovetop. In under 90 minutes including rise time.
This recipe uses a double-garlic method: garlic is mixed directly into the dough, and then a generous garlic-herb butter goes on immediately after cooking. The result is a naan that has garlic in every layer — in the bread itself, not just brushed on the surface — which is the version that actually earns the “garlic naan” name rather than just being plain naan with garlic butter added as an afterthought.
This guide covers everything: the science of a good naan dough, why the water-brush technique creates those signature blisters, the open flame finish that mimics a tandoor’s char, and every variation and expert tip that makes the difference between good naan and extraordinary naan.
What Makes Garlic Naan Different from Plain Naan?
The distinction is worth understanding before you start — because there are actually three different things that restaurants call “garlic naan,” and only one of them is the genuinely flavourful version.
| Version | Garlic in Dough | Garlic Butter | Result |
|---|---|---|---|
| Type 1 (most restaurants) | No | Brushed on surface only | Mild garlic flavour — mostly on the surface |
| Type 2 (better restaurants) | Yes | No extra butter | Garlic flavour throughout — less rich |
| Type 3 (this recipe) | Yes — double garlic | Garlic-herb butter finish | Maximum garlic depth at every level |
The double-garlic method — garlic in the dough plus garlic in the finishing butter — is not just a recipe choice. It is the technique that produces the flavour people are actually trying to describe when they say they want “garlic naan.” The garlic in the dough cooks gently during the rise and baking process, developing a mellow, sweet-savoury depth. The garlic in the finishing butter stays more vibrant and fresh. Together they create a layered garlic character that neither approach achieves alone.
The Science Behind Restaurant-Quality Naan at Home
Why Yeast Matters for Naan Texture
Naan is a leavened bread — meaning it rises before cooking, and that rise is what creates the characteristic soft, slightly chewy interior with air pockets throughout. The leavening agent is yeast, and understanding what yeast does explains why skipping or rushing the rise time ruins the final texture.
Yeast consumes the sugar in the dough and produces carbon dioxide gas. This gas gets trapped in the gluten network formed by the flour and creates bubbles throughout the dough. When those bubbles heat rapidly in a very hot skillet, they expand dramatically — producing the visible, irregular blisters and puffed sections that define a properly made naan.
Instant yeast vs active dry yeast: This recipe uses instant yeast (also called rapid-rise yeast), which does not need to be proofed separately — it can be mixed directly into the flour. However, dissolving it in a small amount of warm water with sugar first is recommended, because the bubbling confirms the yeast is alive and active before you commit to a full batch of dough.
Yeast troubleshooting: If your yeast mixture is not bubbling after 10 minutes, the yeast may be expired or the water may have been too hot (above 43°C/110°F kills yeast) or too cold (below 35°C/95°F is insufficient for activation). Start over with fresh yeast and water that is comfortably warm — not hot — to the touch.
Why a Very Hot Skillet is Non-Negotiable
Restaurant tandoors reach temperatures of 450-480°C (840-900°F). Your domestic oven maxes out at around 250°C (480°F). This temperature gap is why oven-baked naan never quite achieves restaurant results — there simply is not enough heat to cause the rapid expansion of steam and gas that creates a properly blistered naan.
A very hot iron tawa or cast-iron skillet on high heat reaches 250-280°C (480-535°F) at the cooking surface — far hotter than the oven and significantly closer to tandoor conditions. This is the reason the stovetop method consistently outperforms the oven method for naan.
The Water-Brush Technique Explained
Brushing the surface of the rolled naan with water before placing it on the skillet is the technique that creates those signature restaurant-style blisters. Here is what happens:
- The water-brushed side is placed directly on the extremely hot iron surface
- The water flash-evaporates and generates a burst of steam between the dough and the pan
- This steam pushes upward through the soft dough, creating large, irregular air pockets and bubbles
- The heat simultaneously sets the dough around these bubbles, creating blisters that hold their shape
Without the water brush, the naan cooks more evenly — which sounds good but actually produces a flatter, less interesting surface with fewer textural contrasts. The blisters are not just visual — they create areas of varying texture: slightly charred, crisp in spots, pillowy in others. That variation is what makes naan interesting to eat.
Ingredients for Garlic Naan (Makes 6 Naans)
For the Dough
- 1 cup (120g) whole wheat flour (atta) — adds nuttiness and a slightly more complex flavour
- 1 cup (125g) all-purpose flour (maida) — provides the softness and elasticity that makes naan distinctly tender
- ½ teaspoon instant yeast (rapid-rise yeast)
- 1 teaspoon sugar (white granulated or raw) — feeds the yeast during activation
- 1 teaspoon garlic, finely minced — goes directly into the dough (the first garlic dose)
- 2 tablespoons neutral oil (sunflower, refined coconut, or any flavour-neutral vegetable oil)
- ½ to 1 teaspoon fine salt — to taste
- 3 tablespoons warm water (for activating yeast)
- ½ cup warm water (approximately, added gradually when kneading)
For the Garlic-Herb Butter
- 4 tablespoons unsalted butter (or salted — both work)
- 2 teaspoons garlic, finely minced — the second garlic dose, stays more vibrant
- 2 tablespoons fresh mint or fresh coriander (cilantro), finely chopped — or a mixture of both
For Rolling and Topping
- Nigella seeds (kalonji) — sprinkled on the surface before rolling; gives a distinctive flavour and visual appeal
- Sesame seeds (white or black) — good alternative to nigella seeds
- Whole wheat flour or plain flour — for dusting when rolling
- Water — for brushing before cooking
Choosing Your Flour: Whole Wheat vs All-Purpose vs Mixed
This is one of the most common questions about homemade naan, and the answer depends on what you are optimising for:
| Flour Combination | Texture | Flavour | Puff | Best For |
|---|---|---|---|---|
| 100% All-purpose (maida) | Softest, most tender | Neutral | Most puff | Closest to restaurant white naan |
| 50:50 whole wheat + plain (this recipe) | Slightly firm, tender | Nutty, slightly complex | Good puff | Best balance of flavour and softness |
| 100% Whole wheat (atta) | Firmer, denser | Earthy, nutty | Less puff | Healthier option, heartier result |
The 50:50 blend in this recipe is the recommended starting point — it gives you the softness of plain flour while the whole wheat adds a natural, slightly nutty flavour that makes the naan more interesting than an all-white version.
If you are cooking for guests who expect the classic white naan restaurant experience, increase the plain flour. If you prefer a more whole-grain, nutritious result, increase the whole wheat flour. Both work with the same method.
Step-by-Step: How to Make Garlic Naan
Stage 1 — Activate the Yeast (5 Minutes)
In a small bowl, combine the instant yeast and sugar. Add 3 tablespoons of warm water (around 38-40°C — comfortably warm when tested on your wrist, not hot). Stir well until the yeast and sugar are fully dissolved.
Set aside for 5-10 minutes. The mixture should become visibly frothy and bubbly — small foam forming on the surface. This confirms the yeast is active. If there is no bubbling after 10 minutes, your yeast may be expired or the water temperature was off. Start again with fresh yeast.
Stage 2 — Make the Garlic Dough (10 Minutes)
In a large mixing bowl or the bowl of a stand mixer, combine both flours, the minced garlic, oil, and salt. Mix briefly to distribute the ingredients.
Add the activated, frothy yeast mixture to the flour. Begin kneading, adding the remaining warm water gradually — not all at once. The exact amount needed will vary depending on your flour’s absorption and the ambient humidity. Start with ⅓ cup and add more tablespoon by tablespoon until the dough comes together.
Knead for 8-10 minutes by hand (or 5-6 minutes with a stand mixer and dough hook) until the dough is:
- Smooth — no rough surface, no tears when stretched
- Soft — presses in easily but springs back
- Supple — stretches without immediately tearing
- Slightly tacky but not sticky — it should peel cleanly from your hands after kneading
The poke test: Press a floured finger firmly into the dough. It should spring back about 70-80% of the way within 2-3 seconds. If it springs back immediately, it is too tight (under-kneaded or too much flour). If it barely springs back, it may need a little more kneading.
Stage 3 — First Rise (45-60 Minutes)
Shape the dough into a smooth ball. Place in a lightly oiled bowl, turn once to coat the surface with oil (this prevents drying), and cover with a clean, damp kitchen cloth or cling film.
Leave in a warm, draught-free place for 45 minutes to 1 hour until the dough has doubled in size. The time will vary with room temperature — in a warm Indian summer kitchen it may take 30-40 minutes; in a cold winter kitchen it may need up to 90 minutes.
How to tell when rising is complete: The dough should have visibly doubled. Press two fingers firmly into the surface — if the indentations remain and the dough does not spring back, the first rise is complete. If it springs back quickly, give it more time.
Stage 4 — Portion and Rest (15 Minutes)
Once risen, gently punch the dough down to release the accumulated gas. Turn it onto a lightly floured surface and divide into 6 equal portions. Roll each portion into a smooth ball between your palms.
Place the dough balls on a lightly floured tray, cover with a kitchen towel, and rest for 10-15 minutes. This short rest relaxes the gluten, making rolling much easier — the dough will stretch without snapping back.
Stage 5 — Make the Garlic-Herb Butter (5 Minutes)
Melt the butter in a small saucepan over low heat. Once fully melted, remove from heat and add the 2 teaspoons of minced garlic. Stir well. The residual heat of the melted butter will gently cook the garlic, taking the raw, sharp edge off while keeping it fragrant and vibrant.
Once the butter cools to warm (not hot), add the finely chopped mint or coriander. Stir to combine. The herbs should stay bright green — if they turn dull or brown, the butter was too hot when you added them.
Set aside at room temperature. The butter will stay liquid and brushable while you cook the naans.
Stage 6 — Roll the Naans
Take one rested dough ball. Sprinkle a small pinch of nigella seeds (or sesame seeds) on the rolling surface. Press the dough ball lightly over the seeds, then flip — seeds facing up. Lightly dust the top with flour.
Using a rolling pin, roll into an oval or teardrop shape approximately 7-8 inches long and 4-5 inches wide, about 4-5mm thick. Pull the top of the oval gently to create the characteristic tapering teardrop shape associated with naan — this is optional but gives the bread an authentic restaurant look.
Do not roll too thin. A naan that is too thin will not puff properly and will crisp up rather than staying soft. Aim for the thickness of a thick pancake — about 4-5mm.
Flip the rolled naan over carefully so the seed side faces down. Brush the exposed top surface evenly and generously with plain water using a pastry brush or your fingers. This water-brushed side will go face-down onto the hot skillet.
Stage 7 — Cook on the Tawa
Heat a heavy iron tawa or cast-iron skillet over high heat for 3-4 minutes until very hot. Hold your hand 5cm above the surface — it should feel intensely hot within 1-2 seconds.
Do not add any oil or ghee to the pan for this cooking stage.
Carefully pick up the rolled naan and place it water-side-down directly onto the hot skillet surface. Press very gently with a folded kitchen towel to ensure full contact.
Within 30-45 seconds you will see:
- Steam beginning to escape from the edges
- Large, irregular air bubbles forming and puffing up across the surface
- The dough beginning to look drier and more opaque
Cook for 1-2 minutes total on this side until the bottom has clearly defined blisters, the edges are slightly golden, and the dough looks fully cooked at the sides. Use a spatula to check the underside — it should be golden to deep brown in spots with some pale areas. This irregular charring is exactly correct and completely intentional.
Stage 8 — The Open Flame Finish
Use tongs to carefully lift the naan off the skillet. Hold it with the tongs and place the uncooked seed side directly over a medium-high gas flame. Move it constantly over the flame — do not hold it still. The seeds will toast and the surface will get scattered char marks in 15-30 seconds.
Check the previously-cooked side too — if it looks undercooked or pale in areas, hold that side over the flame briefly until it has the blistered, charred character you want.
For an electric or induction cooktop: You cannot do the open flame finish. Instead, after cooking the water side down for 1-2 minutes, flip the naan and cook the seed side on the hot skillet for 60-90 seconds. Finish with a little drizzle of ghee or oil around the edges for extra flavour.
Stage 9 — Butter and Serve
The garlic butter must go on immediately while the naan is still hot from the flame — this is critical. Place the freshly cooked naan directly onto a plate or into a roti basket. Use a pastry brush to apply the garlic-herb butter generously, making sure to distribute some of the garlic pieces and herb across the entire surface.
The hot bread will absorb the butter and the garlic will bloom in the residual heat, releasing its aroma at the moment of serving.
Make each naan in the same way. As you stack them, place buttered surfaces facing each other — this prevents the butter from transferring to your kitchen towel or basket lining.
Cover the basket or plate with a cloth between batches to keep them warm. Serve as soon as all naans are made.
Garlic Naan Variations Worth Making
1. Cheese Garlic Naan
Spread 2 tablespoons of grated mozzarella or processed cheese on half the rolled naan, fold the other half over it, and seal the edges by pressing firmly. Roll gently once more to a roughly 7-inch oval. Cook the same way — the cheese melts inside and oozes gloriously at the edges. Add extra cheese to the top of the finished naan along with the garlic butter for maximum indulgence.
2. Stuffed Garlic Naan
Place 2 tablespoons of any filling on the centre of a rolled naan — paneer crumble with spices, spiced mashed potato, or a herb-cheese mixture all work beautifully. Gather the edges up and pinch to seal, then roll again gently into an oval. The filling heats through during cooking.
3. Garlic Naan with Kasuri Methi
Add ½ teaspoon of crushed kasuri methi (dried fenugreek leaves) to the garlic butter. This small addition gives the butter a distinctively North Indian herbal note that is commonly found at higher-end Indian restaurants.
4. Vegan Garlic Naan
Replace the butter entirely with vegan butter or coconut oil in the finishing garlic mixture. The dough itself is already vegan (the oil is plant-based). Coconut oil adds a subtle sweetness that pairs surprisingly well with garlic and coriander.
5. Peshwari-Inspired Sweet Naan
Skip the garlic entirely. Add 1 tablespoon of sugar and ¼ teaspoon of cardamom to the dough, and stuff with a mixture of desiccated coconut, chopped almonds, and a little sugar. Finish with butter and a dusting of powdered sugar. A completely different but delicious direction.
What to Serve with Garlic Naan
Garlic naan is an extraordinarily versatile bread — it improves almost every Indian curry it is paired with. Here are the best combinations:
Classic North Indian Pairings:
- Dal Makhani — the rich, buttery lentil curry is the most beloved pairing for garlic naan; the bread soaks up the sauce perfectly
- Butter Chicken / Murgh Makhani — the mild, creamy tomato sauce is made for scooping with naan
- Paneer Butter Masala — another classic cream-based curry where every drop of sauce deserves to be captured with bread
- Chole Masala — the spiced chickpea curry provides a more robust contrast to the soft naan
- Shahi Paneer — the gentle, Mughlai-style curry pairs beautifully with the garlic’s warmth
Less Obvious but Excellent Pairings:
- Veg Manchurian gravy — the Indo-Chinese sauce is magnificent with garlic naan; surprisingly one of the most popular combinations in Indian food culture
- Chilli Paneer (gravy version) — the bold, tangy sauce works extremely well
- Hummus — serve garlic naan cut into triangles as a dipping bread; the combination is extraordinary
Complete the Meal:
- Cucumber Raita — cooling contrast to both the spiced curry and the garlic
- Laccha Onion Salad — raw sharpness cuts through richness
- Lemon wedges — a squeeze on the naan or the curry
- Mango or lemon pickle — adds brightness and fermented funk
Expert Tips for Perfect Garlic Naan Every Time
The skillet must be genuinely very hot. Testing with a drop of water — it should evaporate immediately with a sharp sizzle — is more reliable than guessing. Insufficient heat produces flat, pale naan without blisters. Heat the pan for a full 3-4 minutes on high before your first naan.
Roll to the correct thickness. 4-5mm is the target. Thinner naan loses its softness and crisps up rather than staying tender. Thicker naan takes longer to cook and the inside may stay doughy.
Do not flour the skillet. Excess flour on a dry pan burns instantly and produces a bitter taste. Dust only the rolling surface — use the minimum needed to prevent sticking.
Butter goes on immediately. The naan absorbs the garlic butter most effectively when it is fresh from the flame. Even 2 minutes of cooling reduces absorption noticeably. Keep the butter warm and apply it the second each naan comes off the heat.
The garlic butter temperature matters. If the butter is too hot when you add the herbs, the herbs will cook and lose their fresh colour and flavour. Add herbs only once the butter has cooled to warm — roughly 50-55°C / 120-130°F, which feels warm but not uncomfortable to touch.
Work systematically. While one naan is rising in the skillet, roll the next one. Working in a rhythm ensures the skillet stays at optimal temperature and you are not waiting between batches.
Storage and Make-Ahead Tips
Storing cooked naan: Wrap leftover naan in aluminium foil while still slightly warm — the trapped steam keeps them from drying out. Store at room temperature for up to 1 day, or refrigerate for 2-3 days.
Reheating: The best method is wrapping in aluminium foil and warming in a preheated oven at 180°C (350°F) for 5-8 minutes. Alternatively, warm briefly on a dry tawa over medium heat for 30-45 seconds per side. Avoid the microwave — it makes naan rubbery.
Freezing: Cooked naan freeze well for up to 1 month. Cool completely, wrap individually in cling film, then place in a freezer bag. Reheat from frozen in a 180°C oven for 10-12 minutes wrapped in foil.
Make-ahead dough: After the first rise, the dough can be refrigerated for up to 24 hours. The cold slows the yeast dramatically. Bring the dough to room temperature for 30 minutes before portioning and rolling. Refrigerator-retarded dough often has slightly better flavour than same-day dough.
Frequently Asked Questions
Q1. Can I make garlic naan without yeast?
Yes — and it is much faster. Replace the yeast and the rise time with ½ teaspoon of baking powder and ½ teaspoon of baking soda mixed into the flour, plus ¼ cup of plain yogurt added with the water. The yogurt provides the acidity that activates the raising agents. No rise time needed — roll and cook immediately. The result is a slightly different texture (less chewy, more biscuit-like) but still very good and ready in 20 minutes total.
Q2. Why is my garlic naan hard and chewy instead of soft?
Three most likely causes: the dough was too dry (not enough water during kneading), the naan was rolled too thin, or it was overcooked on the skillet. Naan dough should feel soft and pliable — slightly tacky but not sticky. Roll to 4-5mm thickness. On the skillet, pull the naan when the surface looks set but still slightly soft when pressed. It continues cooking in residual heat after removal.
Q3. Can I cook garlic naan in an oven instead of on the stovetop?
You can, but the result will be noticeably different — paler, less charred, and more even in texture. If using the oven: preheat to the highest setting (250°C/480°F) for at least 30 minutes. Place a heavy baking stone or inverted cast-iron skillet on the top shelf to preheat with the oven. Roll the naan, brush with water, and bake for 3-4 minutes until puffed and lightly golden. Finish under the broiler/grill for 1-2 minutes for some colour. Apply garlic butter immediately.
Q4. How do I get big blisters on my naan like in restaurants?
Big blisters require three things working together: a very hot cooking surface (heat the pan for 3-4 full minutes before starting), a generous water brush on the surface that touches the pan, and properly leavened dough with active yeast bubbles throughout. The steam from the water evaporating and the gas from the yeast expanding under heat are what create blisters. Under-risen dough, a lukewarm pan, or insufficient water brushing will all produce flatter, blister-free naan.
Q5. Can I make the garlic naan dough in advance?
Yes — the dough can be made ahead in two ways. First, after the first rise completes, refrigerate the dough (punched down, covered) for up to 24 hours. The cold temperature slows fermentation to a near-halt. Bring to room temperature 30-45 minutes before rolling. Second, portion the dough into balls after the first rise and freeze — thaw overnight in the refrigerator and allow to come to room temperature before rolling. Cold-retarded dough often has slightly deeper, more complex flavour than same-day dough.
The Naan That Makes Every Curry Worth It
Good garlic naan is not just a bread — it is the thing that turns a good meal into a great one. The instrument that makes sure no drop of dal makhani or butter chicken is left in the bowl. The thing that makes guests at your table quiet for a moment when the basket arrives.
Making it at home removes the mystery and replaces it with craft. The yeast, the rise, the water brush, the screaming-hot skillet, the open flame — each step has a purpose, and each purpose is achievable in a regular home kitchen with nothing more specialized than a cast-iron pan.
Make a batch this week. Pair it with whatever curry or dal is your favourite. Share your results in the comments below — tell us your flour combination, whether you added nigella seeds or sesame, and which curry you served alongside it. If you took a photo of the blisters, share that too.
For more Indian bread and curry recipes, explore our complete collection at KitchenWhisper.in — from Butter Chicken to Dal Makhani and everything in between.
Pairs perfectly with: Dal Makhani | Butter Chicken | Paneer Butter Masala | Shahi Paneer | Chole Masala | Chilli Paneer