There is a version of chocolate chip cookies that every home baker is chasing — whether they know it yet or not.
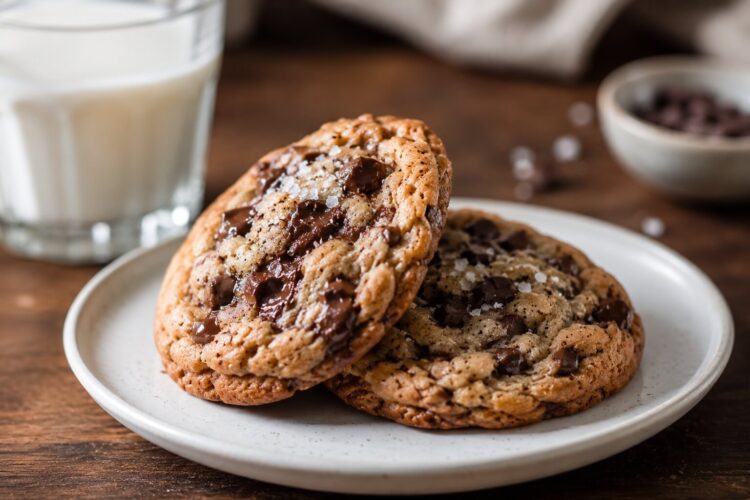
It has golden, slightly crisp edges that give that satisfying resistance when you bite in. The center is soft, pillowy, and just barely set — almost gooey, like the cookie is still warm even when it has cooled. The chocolate melts in pools rather than staying as rigid chips. And there is a depth of flavor behind the sweetness — something caramel-like, slightly complex, that makes you reach for a second without even thinking about it.
That version exists. It is not a mythical bakery secret. It is a matter of understanding exactly which ingredients do what — and making a handful of deliberate choices that take the cookie from good to genuinely extraordinary.
This recipe has been tested dozens of times to arrive at precisely that result. Crisp edges. Chewy center. Deep flavor. Pools of melted chocolate. And it is genuinely easy — the whole thing comes together in under 30 minutes if you want cookies fast, or produces even better results with an optional chill that deepens the flavor without any extra effort beyond patience.
Let’s talk about what makes it work.
The Science Behind Perfect Chewy Chocolate Chip Cookies
Understanding why each ingredient does what it does is the difference between following a recipe and actually knowing how to bake. Once you understand this, you can troubleshoot any batch, adjust for different textures, and make informed decisions about substitutions.
Brown Sugar vs White Sugar: The Texture Duo
This recipe uses both, and each serves a completely different purpose.
Brown sugar contains molasses — a hygroscopic ingredient that attracts and retains moisture. This is what creates the chewy center. Brown sugar also has a slightly lower pH (more acidic) than white sugar, which causes cookies to spread more during baking and contributes to the characteristic caramel-like flavor depth. The more brown sugar relative to white, the chewier and more complex the cookie.
White granulated sugar creates crispness. When it melts and caramelizes at the cookie edges during baking, it produces those addictive crisp, golden rims. The ratio of ¾ cup brown to ½ cup white in this recipe is calibrated specifically for crisp edges with a genuinely chewy center — not too much of either.
Pro insight: If you want a chewier cookie, increase the brown sugar by 2 tablespoons and reduce the white sugar by the same amount. For crisper cookies, do the opposite.
Why Baking Soda — Not Baking Powder
This distinction matters more than most bakers realize.
Baking soda (sodium bicarbonate) requires an acid to activate — and it gets that acid from the brown sugar’s molasses and the butter. When it activates, it produces carbon dioxide bubbles that make cookies rise and spread. Critically, baking soda also promotes the Maillard reaction — the browning process that creates flavor compounds. This is why baking soda cookies have that characteristic golden, slightly nutty flavor.
Baking powder contains both an acid and a base, so it activates without needing an acid in the recipe. The result with cookies? More lift, more puff, cakier texture, and less browning. That is the opposite of what we want in a chewy cookie.
Never substitute baking powder for baking soda in this recipe. The result will be cakey, pale, and disappointingly un-chewy.
The Role of the Egg
One whole egg provides three things:
- Structure — egg proteins set during baking and help the cookie hold its shape
- Moisture — from the egg white, contributing to chewiness
- Richness — the yolk’s fat content adds flavor and tenderness
Some recipes use just a yolk (more tender, more dense) or add an extra yolk (chewier, richer). This recipe’s single whole egg hits the ideal balance — chewy without being dense.
Butter: Softened, Not Melted, Not Cold
The state of your butter is one of the most important variables in cookie baking. Three possible states produce three different cookies:
- Cold butter: Cookies barely spread; thick, dense, almost scone-like texture
- Softened butter (correct): Creams properly with sugar, trapping air; even spread; balanced chewy-crisp texture
- Melted butter: Cookies spread wide and flat; denser, chewier, slightly fudgier
How to tell if butter is properly softened: Press your finger into it. It should leave a clear indent but not sink completely. The butter should feel slightly cool, not warm or greasy. If it is leaving greasy marks on the bowl, it is too warm — refrigerate it for 10-15 minutes before creaming.
Ingredients for Chewy Chocolate Chip Cookies (Makes 32 Cookies)
Dry Ingredients
- 2½ cups (300g) all-purpose flour — measure by weight for accuracy; see note below
- ¾ teaspoon baking soda — check the expiry date; old baking soda means flat cookies
- ¾ teaspoon fine sea salt — fine salt distributes evenly; flaky salt is used as a finishing touch
- 2 teaspoons cornstarch (secret ingredient — optional but highly recommended) — see below
Wet Ingredients
- 1 cup (227g) unsalted butter, softened — unsalted gives you control over salt levels
- ¾ cup (165g) light brown sugar, packed — must be soft and moist; hard dry brown sugar will not cream properly
- ½ cup (100g) granulated white sugar
- 1 large egg, room temperature — cold eggs can cause the butter-sugar mixture to seize
- 1 tablespoon pure vanilla extract — a full tablespoon; do not reduce this
Mix-Ins
- 1½ cups (270g) semisweet chocolate chips or chunks — plus extra for pressing on top
Optional Finishing
- Flaky sea salt (Maldon or similar) — sprinkle immediately after coming out of the oven; the salt hits the warm chocolate and creates an extraordinary contrast
The Secret Ingredient: Cornstarch
Add 2 teaspoons of cornstarch to the flour mixture for the softest, most bakery-like cookies imaginable.
Cornstarch (cornflour in the UK) works by interfering with gluten development in the flour. Less gluten means a more tender, softer crumb — the texture you associate with high-end bakery cookies that feel impossibly soft even at room temperature. It also lowers the overall protein content of the flour blend, which reduces spread slightly while improving the chewy texture.
This is the single most impactful upgrade you can make to a basic chocolate chip cookie recipe. Two teaspoons is all it takes.
Step-by-Step: How to Make Perfect Chewy Chocolate Chip Cookies
Step 1 — Prep Your Workspace
Preheat the oven to 350°F (175°C). Line two baking sheets with parchment paper or silicone baking mats — do not use wax paper (it smokes at oven temperatures) or an unlined pan (cookies will spread too much and burn underneath).
Take your butter and egg out of the refrigerator at least 30 minutes before you start. Room-temperature ingredients combine more smoothly and produce a more uniform dough.
Step 2 — Combine the Dry Ingredients
In a medium bowl, whisk together the flour, cornstarch (if using), baking soda, and salt until uniformly combined. Set aside.
Flour measurement — the most common mistake: Do not scoop flour directly from the bag with your measuring cup. This compacts it and can add 20-30% more flour than the recipe intends, producing dry, crumbly cookies. Instead: fluff the flour with a fork, spoon it loosely into the measuring cup, and level the top with a straight edge. Better yet — use a kitchen scale (300g for 2½ cups).
Step 3 — Cream Butter and Sugars (The Most Important Step)
In the bowl of a stand mixer fitted with the paddle attachment (or in a large bowl using a handheld electric mixer), combine the softened butter, packed brown sugar, and granulated sugar.
Beat on medium-low speed for a full 4-5 minutes — much longer than most home bakers do. During this time, the sugar crystals cut into the butter, creating tiny air pockets. The mixture should transform from dense and grainy to pale, fluffy, and almost doubled in volume.
This creaming step is the structural foundation of the cookie. Under-creaming produces flat, dense cookies. Proper creaming produces lighter, chewier results with better spread.
Signs of proper creaming: The mixture looks pale (almost white-beige rather than tan), feels light when you rub it between your fingers, and has increased significantly in volume.
Step 4 — Add Egg and Vanilla
Add the room-temperature egg and vanilla extract. Beat on medium speed for 60-90 seconds until fully incorporated. Stop the mixer and scrape down the sides and bottom of the bowl with a rubber spatula — butter often hides in corners and needs to be incorporated.
Step 5 — Add Dry Ingredients (Do Not Overmix)
With the mixer on the lowest speed, gradually add the flour mixture — add it in 3 additions rather than all at once. Mix just until the last traces of flour disappear. Do not continue mixing once the dough looks unified.
Overmixing develops gluten strands that make cookies tough rather than chewy. This step should take less than 60 seconds once you start adding the flour.
Step 6 — Fold In Chocolate Chips by Hand
Turn the mixer off. Add the chocolate chips and fold them in with a rubber spatula — do not use the mixer. The spatula gives you full control and prevents over-working the dough.
Press extra chocolate chips on top of the scooped dough balls — this is one of the most impactful visual and textural upgrades. Those extra chips stay on the surface rather than sinking, creating melted chocolate pools visible on the finished cookie.
Step 7 — Scoop the Dough
Using a 1½-tablespoon cookie scoop (or two spoons), portion the dough into equal balls and place on the prepared baking sheets, spacing them 2 inches apart. The scoop ensures uniform size — uniformly-sized cookies bake evenly. Inconsistent sizes mean some are undercooked while others are overdone.
For bakery-style larger cookies: Use a 3-tablespoon or ¼-cup scoop. Place only 6-8 per sheet. Add 1-2 minutes to bake time.
Step 8 — To Chill or Not to Chill?
Baking immediately: The cookies will spread more and have lighter flavor. Still excellent — and ready in 30 minutes total.
Chilling for 1 hour: Slightly less spread, slightly chewier texture, marginally better flavor.
Chilling for 24-72 hours: Significantly deeper, more complex flavor as the flour hydrates and sugars caramelize at room temperature. More defined edges. Noticeably better cookies. This is the professional baker’s approach.
For best everyday results: Bake half immediately to satisfy the immediate craving, then refrigerate the remaining dough balls overnight and bake the next day. Compare the two — the difference is convincing.
Step 9 — Bake
Bake one sheet at a time on the center rack. Two sheets in the oven simultaneously creates uneven heat distribution.
Oven temperature: 350°F (175°C). Use an oven thermometer — most home ovens run 15-25°F off their displayed temperature, and even a small variation significantly affects cookie spread and browning.
12-14 minutes for room-temperature dough balls. 13-15 minutes for chilled dough.
The doneness test: Look for edges that are set and golden brown, and a center that looks slightly puffed and dry on the surface but still feels soft if you gently press it. This is the moment to take them out. They look underdone — that is correct. They will continue cooking on the hot pan for 5-10 minutes after leaving the oven.
The most common mistake: Baking until the center looks set in the oven. By that point, the cookies will be overdone and hard by the time they cool. Pull them when the center still looks soft.
Step 10 — Salt, Cool, and Serve
Immediately after removing from the oven, sprinkle flaky sea salt over each cookie while the chocolate is still molten. The salt blooms into the warm chocolate and creates a flavor contrast that is genuinely extraordinary — sweet, salty, chocolatey, all at once.
Leave the cookies on the baking sheet for 5-10 minutes. During this time, the residual heat of the pan finishes cooking the centers and the cookies firm up from soft and fragile to perfectly chewy. Do not try to move them before this — they will fall apart.
Transfer to a wire rack to cool completely (or, more realistically, eat them warm immediately).
Chill Time Comparison: What Actually Changes
| Condition | Spread | Texture | Flavor | Bake Time |
|---|---|---|---|---|
| Bake immediately | Most spread | Chewy, good | Sweet, pleasant | 12-14 min |
| Chilled 1 hour | Moderate spread | Chewier, better | Deeper, more complex | 13-15 min |
| Chilled 24-48 hours | Least spread | Chewiest, defined | Noticeably richer | 14-16 min |
| Baked from frozen | Medium spread | Firm edges, chewy | Good | 14-17 min |
5 Variations Every Cookie Baker Should Try
1. Brown Butter Chocolate Chip Cookies
Replace the softened butter with browned butter (beurre noisette). Cook the butter in a saucepan over medium heat, swirling constantly, until it turns golden and smells nutty — about 5-7 minutes. Cool completely (refrigerate for 30-45 minutes until solid and softened). Use in place of regular butter. The result is a dramatically more complex, almost toffee-like flavor that transforms the cookie entirely.
2. Extra Thick Bakery-Style Cookies
Use a ¼ cup scoop and place only 6 per sheet. Chill the dough balls for a minimum of 2 hours before baking. The cold dough holds its height longer as it bakes, producing thick, restaurant-style cookies with a significantly more pronounced contrast between the crisp exterior and soft, almost underbaked center.
3. The Chocolate Lover’s Version
Use a combination of chocolate types: ¾ cup semisweet chips + ½ cup chopped dark chocolate bar (70% cacao) + ¼ cup milk chocolate chips. The chopped bar creates shards and puddles of chocolate throughout the dough for chocolate in every single bite. Finish with flaky salt.
4. Mix-In Variations (Keep Total Mix-Ins to 1½ Cups)
- Pecan Chocolate Chip: ¾ cup chips + ¾ cup roughly chopped toasted pecans
- Walnut & Dark Chocolate: ¾ cup walnuts + ¾ cup chopped 70% dark chocolate
- Cranberry White Chocolate: 1 cup white chips + ½ cup dried cranberries
- M&M Funfetti: 1 cup M&Ms + ½ cup colorful sprinkles
- PB & Chocolate: ¾ cup chocolate chips + ¾ cup peanut butter chips
5. Gluten-Free Adaptation
Replace all-purpose flour with a 1:1 gluten-free baking blend (Bob’s Red Mill, King Arthur, or similar). Add 2-3 tablespoons of milk since gluten-free flour blends typically absorb more liquid than wheat flour. The spread and texture will be slightly different but the cookies will still be delicious. Chill the dough for at least 1 hour for better results with gluten-free flour.
Freezing and Storage Guide
Freezing Unbaked Dough Balls (Best Method)
Scoop dough into balls and place on a lined baking sheet. Freeze uncovered for 2-3 hours until completely solid. Transfer the solid balls to a zip-top freezer bag or airtight container, label with date, and freeze for up to 3 months.
To bake from frozen: No thawing needed. Place frozen dough balls directly on a lined baking sheet and bake at 350°F for 14-17 minutes. The extra time accounts for the frozen center.
Why this method is better than freezing mixed dough: Individual balls bake immediately when needed — you can bake 2 cookies or 20 without committing to a whole batch.
Storing Baked Cookies
Store in an airtight container at room temperature for up to 5 days. To keep them soft, place a slice of white bread in the container — the cookies absorb moisture from the bread and stay soft for longer.
Freeze baked cookies: Flash freeze on a sheet until solid, then transfer to a freezer bag for up to 3 months. Thaw at room temperature for 20-30 minutes, or warm in a 300°F oven for 5 minutes.
Troubleshooting: What Went Wrong and How to Fix It
| Problem | Likely Cause | Fix |
|---|---|---|
| Cookies too flat | Butter too warm / too little flour | Chill dough 1 hour; measure flour accurately |
| Cookies too dry/crumbly | Too much flour | Weigh flour; spoon into cup rather than scooping |
| Cookies didn’t spread | Cold ingredients / too much flour | Use room-temperature butter and egg; reduce flour by 2 tbsp |
| Cookies too hard | Overbaked | Pull when center looks underdone; bake 1 min less |
| Edges burned, raw center | Oven too hot / dark pan | Use light-colored pan; verify oven temp with thermometer |
| Cakey texture | Baking powder used / too many eggs | Use only baking soda; check recipe adherence |
| No flavor depth | Imitation vanilla / cold ingredients | Use pure vanilla extract; ensure room-temperature butter |
Expert Baking Tips Summary
Weigh your flour. A kitchen scale is the single best investment a home baker can make — $15 changes your baking permanently. 300g is 300g; “2½ cups” can be anywhere from 275g to 380g depending on how you measure.
Cream for longer than you think is necessary. 4-5 minutes of proper creaming is what separates flat, dense cookies from light, chewy ones. Most home bakers stop at 1-2 minutes. Keep going.
Bake one sheet at a time, always. The difference in cookie quality between single-sheet and double-sheet baking is significant. Rotating, adjusting, and monitoring is simply not as effective as giving each sheet its own full, even bake.
Pull them when they look underdone. This is the hardest rule to follow because it feels wrong. But the center will set to perfect chewiness as the cookies cool on the hot pan. Trust the process.
Add extra chips on top. Press 3-5 chocolate chips onto each dough ball just before baking. This is entirely aesthetic — but it makes the finished cookies look spectacular and ensures maximum chocolate in every visible surface.
Frequently Asked Questions
Q1. What makes a chocolate chip cookie chewy instead of crispy?
Three factors create chewiness: brown sugar (the molasses attracts moisture), properly creamed butter (creates the right fat distribution), and slight underbaking (pulling cookies when the center is still soft and letting residual pan heat finish cooking). For maximum chewiness, chill the dough for 24-48 hours, use more brown sugar than white, and add 2 teaspoons of cornstarch to the flour mix.
Q2. Why do my cookies spread too much and go flat?
Flat cookies are almost always caused by one of four things: butter that is too warm or melted, too little flour, over-sugared dough, or an oven that is too cool (a cooler oven keeps the fat liquid longer, causing cookies to spread before the edges set). Ensure butter is softened but cool to the touch, measure flour accurately using a scale, and verify oven temperature with an inexpensive oven thermometer.
Q3. Can I make these cookies without a stand mixer?
Absolutely. A handheld electric mixer works equally well. The creaming step (4-5 minutes) can also be done by hand with a wooden spoon if the butter is properly softened — it will take 8-10 minutes of vigorous mixing by hand, but it works. The key is ensuring the butter and sugar become pale and fluffy regardless of method.
Q4. Why is it important to rest cookies on the pan after baking?
Freshly baked cookies are fragile and still cooking when they come out of the oven. The hot baking sheet continues cooking the bottom and center of the cookie through conduction for 5-10 minutes after the heat is turned off. Moving cookies too soon causes them to fall apart, leave their bottom layer on the pan, and miss the final cooking that gives them their set, chewy texture. Patience at this stage directly affects the final quality.
Q5. How do I get the pools of melted chocolate on top like bakery cookies?
Two techniques: First, press 3-5 extra chocolate chips or a piece of chopped chocolate bar onto the top of each dough ball just before baking — these surface chips melt into visible pools rather than sinking into the dough. Second, immediately after pulling the cookies from the oven (while still very hot), gently press a few additional chips into the surface — they will melt instantly into glossy pools. This is the purely visual trick that makes home-baked cookies look professional.
Conclusion: Your Perfect Cookie Is One Batch Away
The best chocolate chip cookie is not a mystery. It is brown sugar for chew, white sugar for crisp edges, proper creaming for structure, careful flour measurement for tenderness, and a confident pull from the oven while the center is still soft.
Make this recipe once with attention — weigh the flour, cream properly, trust the underdone center — and you will understand immediately why these are the only cookies you will ever need to make again.
Then make them again with brown butter. Then again with the 24-hour chill. Each version is a revelation in its own right.
Bake a batch this weekend and leave your result in the comments below — tell us your chip-to-cookie ratio, whether you tried the brown butter, and what your family’s verdict was. If someone went for a second (or third) before the first batch even cooled, we want to know that too.
Goes perfectly with: Cold whole milk | Vanilla ice cream | Hot coffee | Warm chocolate milk